Open for business

After restoring my own pianos for four years, I’ve decided to open my shop to customers’ instruments. Each of the six pianos I’ve restored to date were stripped down entirely to their individual components and rebuilt. So I feel confident in taking in others’ instruments – confident that I know how to perform typical repair and maintenance procedures and that I can do the job correctly with the initial learning curve behind me.

For a couple of years, I’ve been posting my financial and labor records on this website using my ShopChart management application and I plan to continue doing so. Between ShopChart and the photos I post to this website, customers will be able to keep close track of the progress of their instruments.

I’ll offer full restorations, individual repairs or even service on individual components like keys and pickups. And although I don’t work on electronics, local amplifier repairman and former Rhodes service technician Paul Schmittauer has agreed to handle work on the amplifiers and preamps of any Suitcase pianos that might come my way.

Miracle Mod

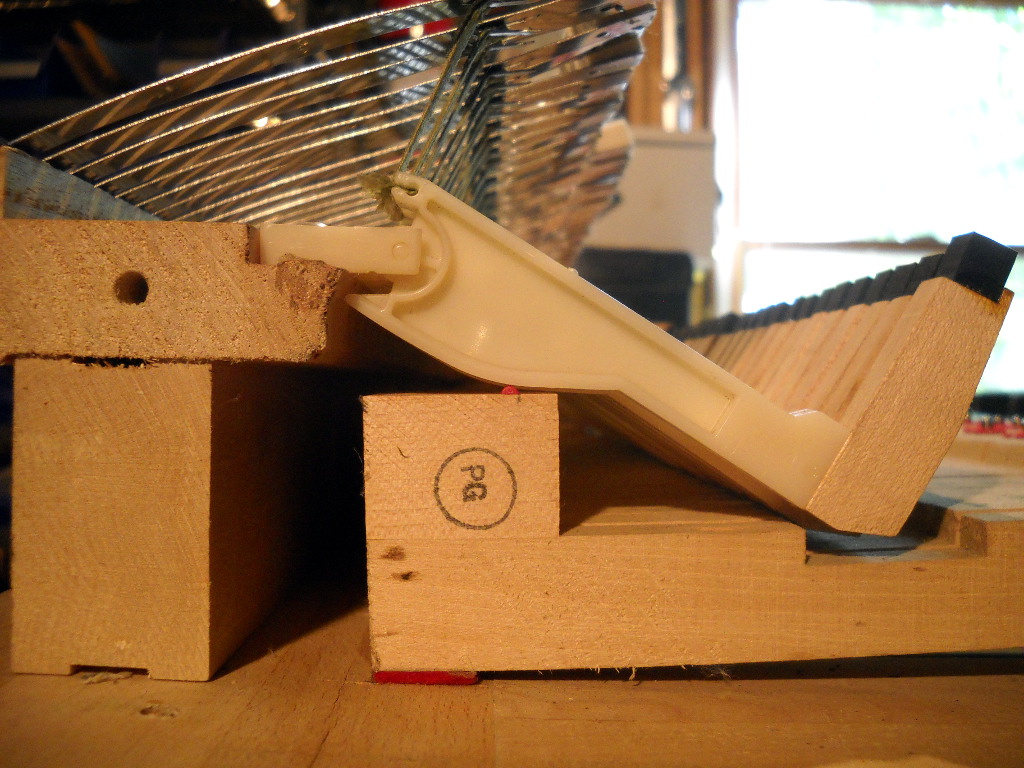
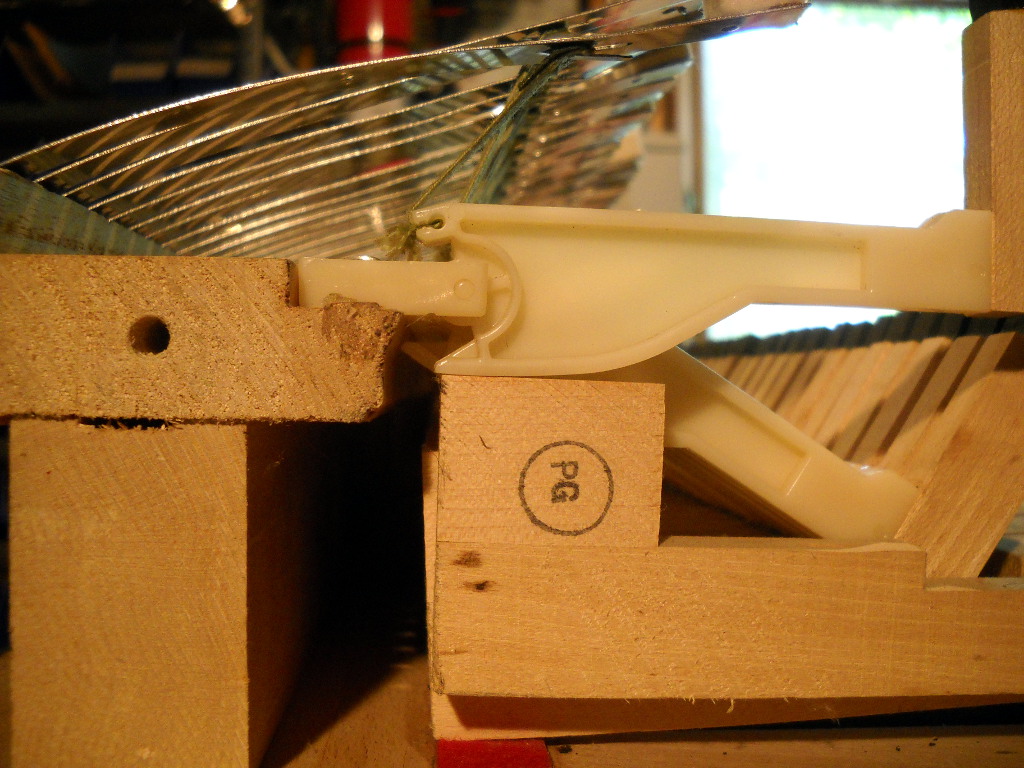
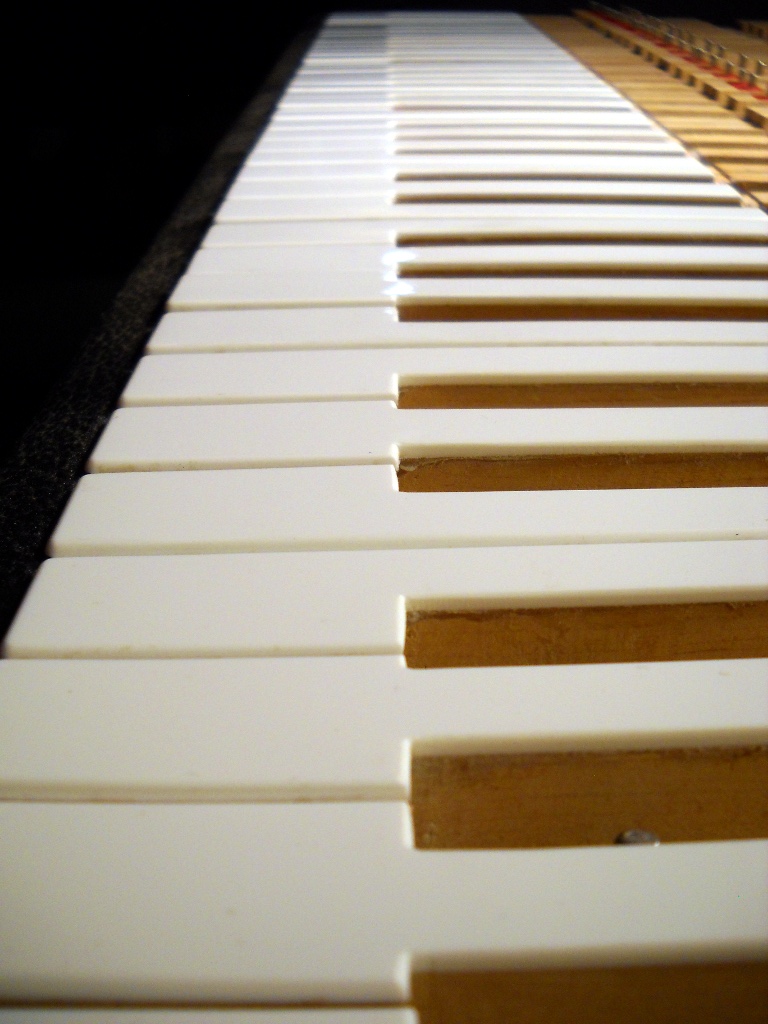
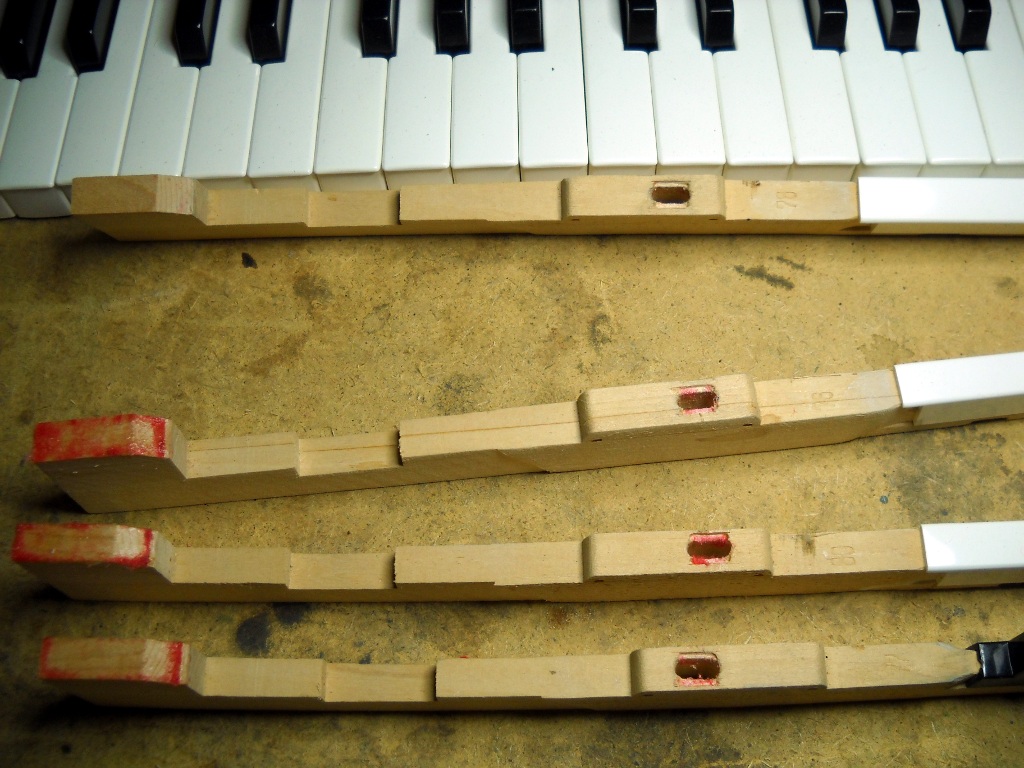
Of all the components that make up the action of a Rhodes, perhaps none is more important to the feel of the keyboard than the key pedestal and hammer cam. The interaction of these two parts is responsible for causing the hammer to strike its tine, preventing the hammer from bouncing on its return and limiting the downward motion of the key. Several different designs of both pedestals and cams were used at different periods in the production of Rhodes pianos. Of the various pedestal designs, it is generally agreed that those which display a flat profile or one that falls away in the front produce an undesirable playing feel. Pianos with such a design tend to feel both heavy and mushy providing no distinct sense for when the hammer is flung upward or when it returns to its stop-lock position. Unfortunately, flat-top pedestals were installed at the factory for much the first half of the 70’s.

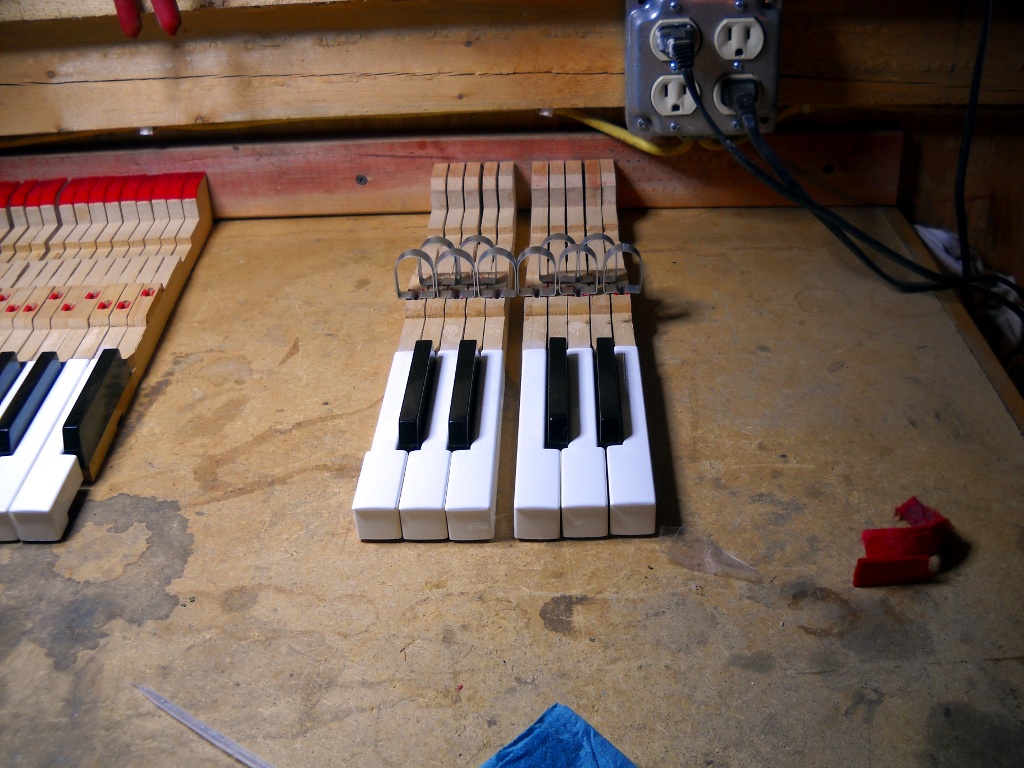
Luckily, the cure for poorly-designed pedestals is a simple and inexpensive one. Commonly called the Miracle Mod, its effect on the action is such that the name is not considered hyperbole by most. Opinions vary on the exact implementation of the modification. Generally speaking, it involves the addition of a small bump to the front of the key pedestal. The shape and location of the bump though are matters of some dispute among practitioners. For the four installations I’ve done, the half-round bumps supplied by Vintage Vibe were used and my placement was guided by their YouTube video on the subject as well as information from the Electric Piano Forum.

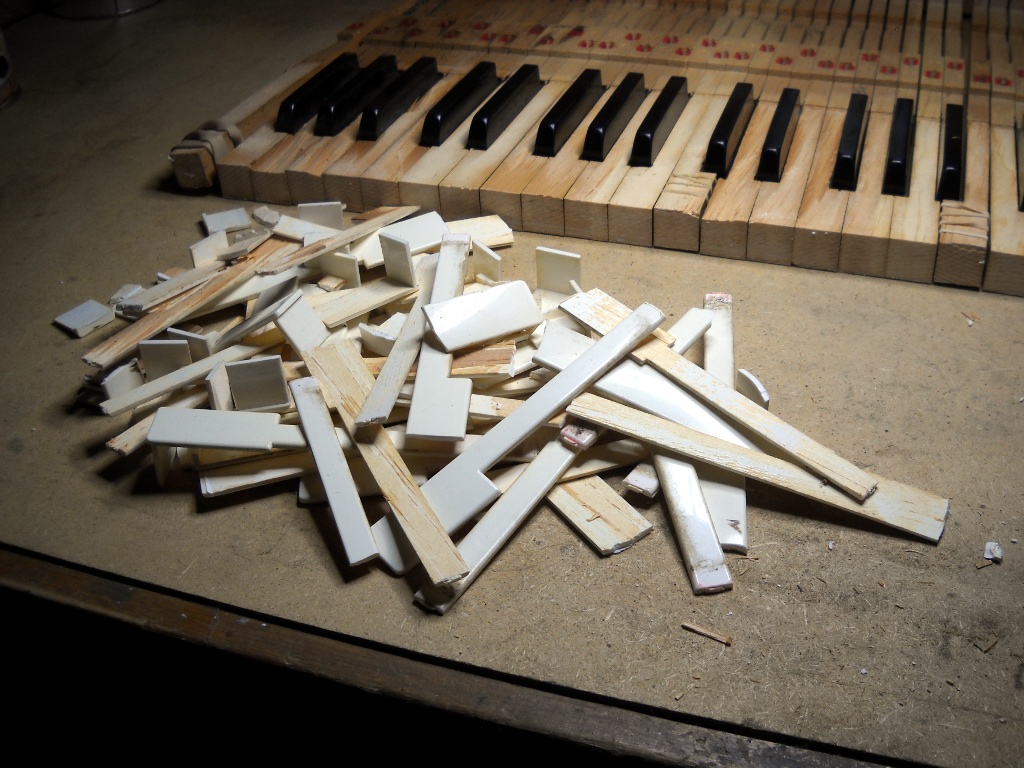
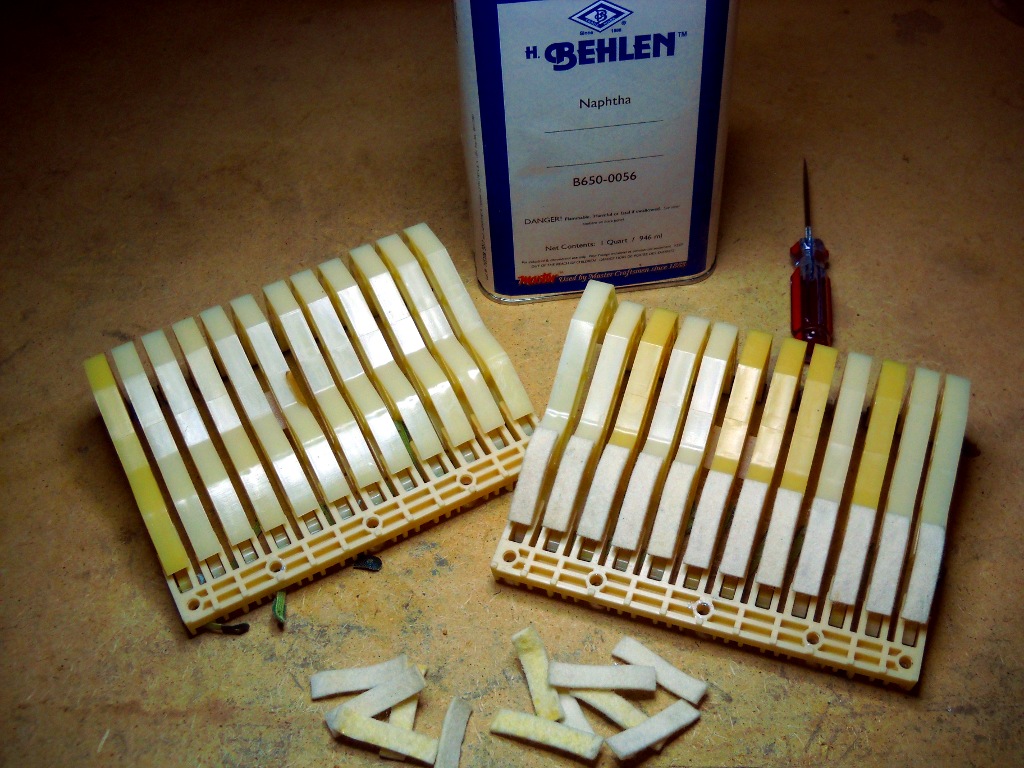
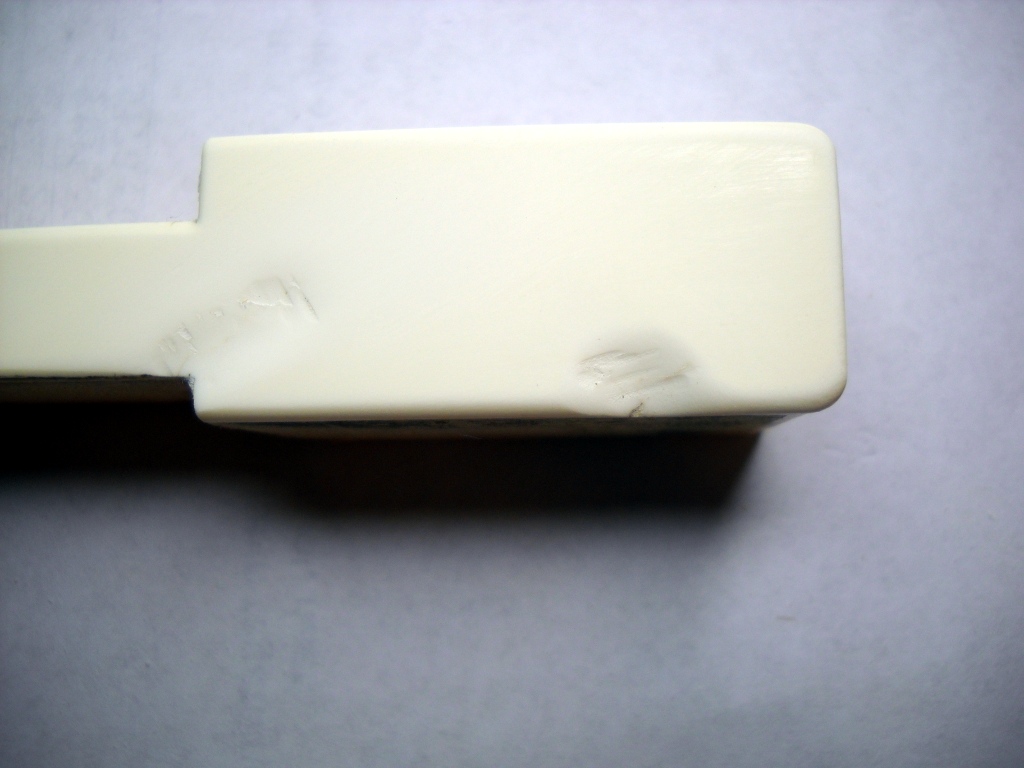
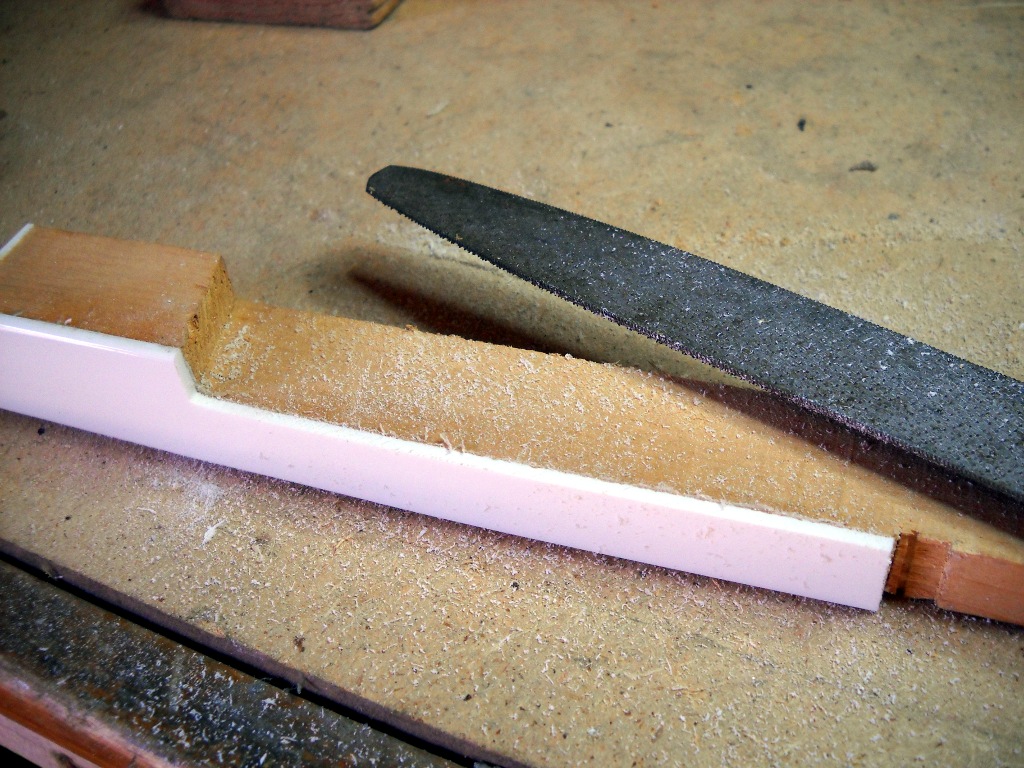
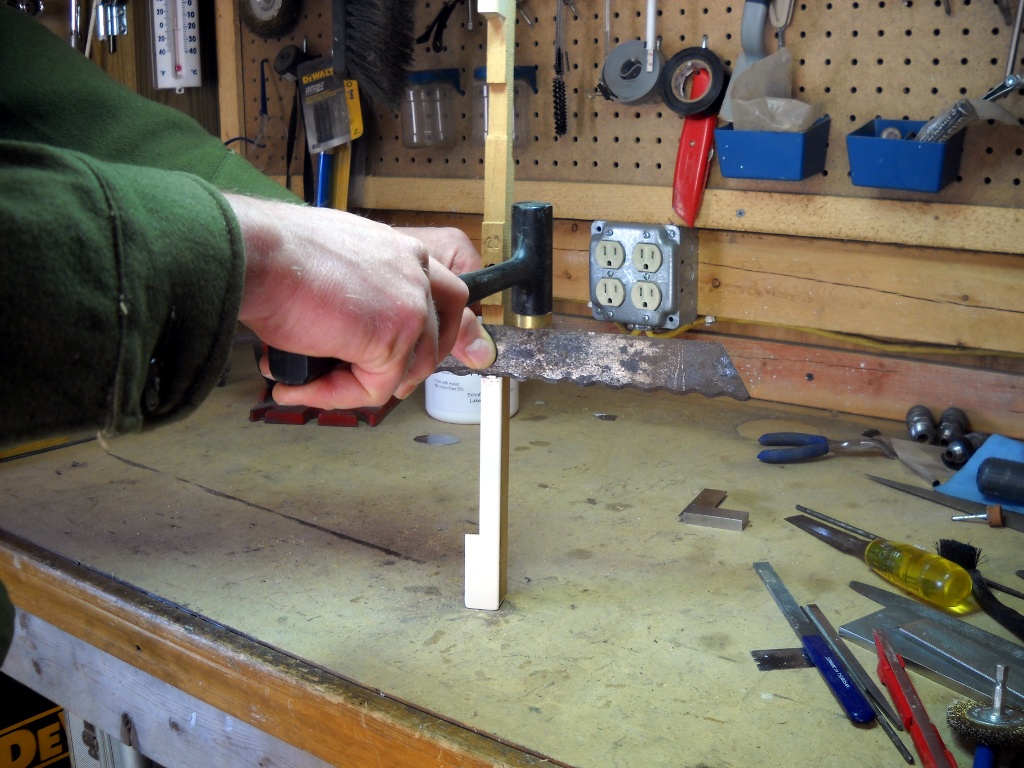
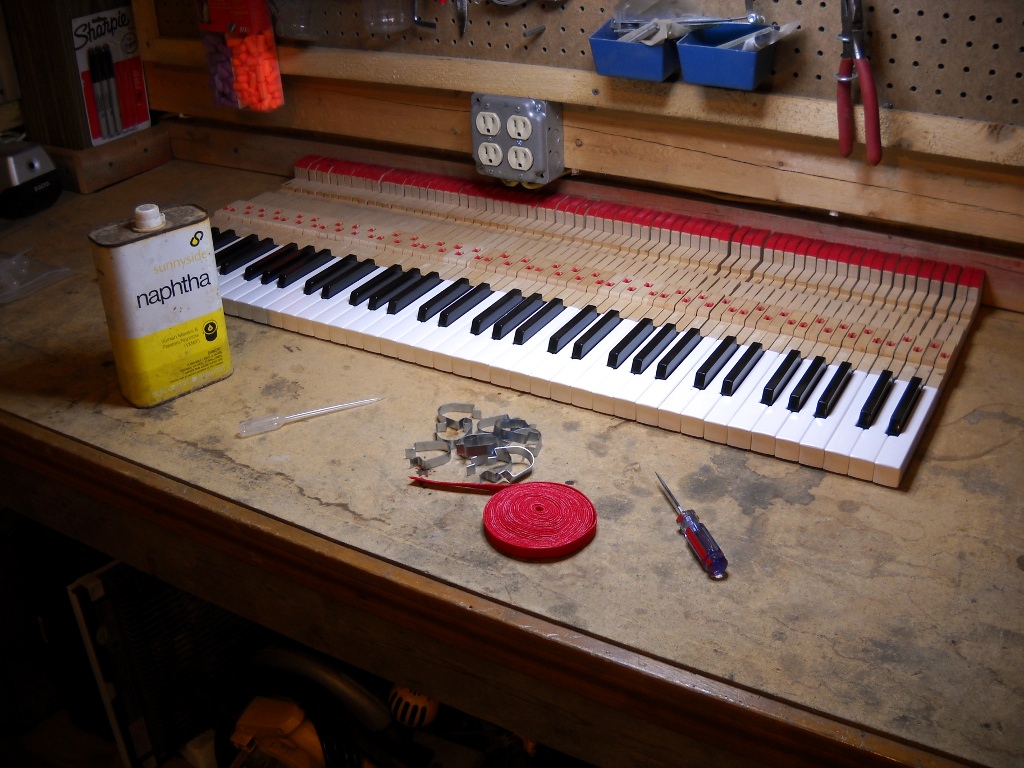
The Vintage Vibe video linked above would lead one to believe this job can be done without having to remove the pedestal felts. The piano they used was built around 1976 during a period when Rhodes installed the felt onto the hammer cam rather than the key pedestal. With a piano of that vintage, the bump can indeed be installed onto the pedestal and the felt left on the cam but I wouldn’t expect such an arrangement to hold up for very long. Even using a glue formulated specifically for the job, it’s difficult to reliably adhere such a small piece of plastic to a wood surface. Installing the felt on top of the bump helps a great deal in securing everything in place. Since there isn’t room for two pieces of felt between each hammer and pedestal, the material glued to the hammer cams must be removed. When I removed the felt from the hammers of two pianos from 1976, I found naphtha made the job fairly easy. With only a little effort, I was able to remove every trace of the felt’s adhesive without damaging the plastic hammer. I struggled to remove the felt from the pedestals of the 1973 I’d worked on previously. After trying several less aggressive methods to loosen the glue, I finally settled on acetone. The felt’s glue responds very well to acetone but this is also true of the plastic key tops which are instantly disfigured from contact.

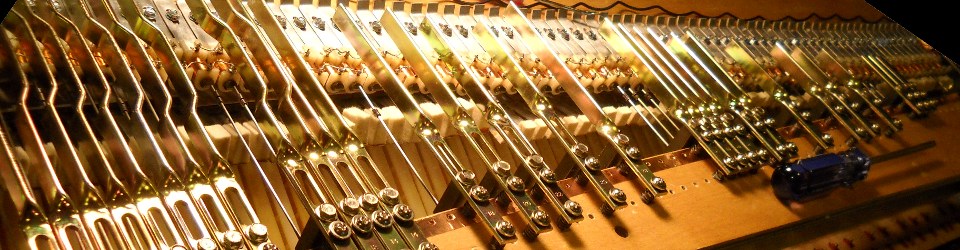
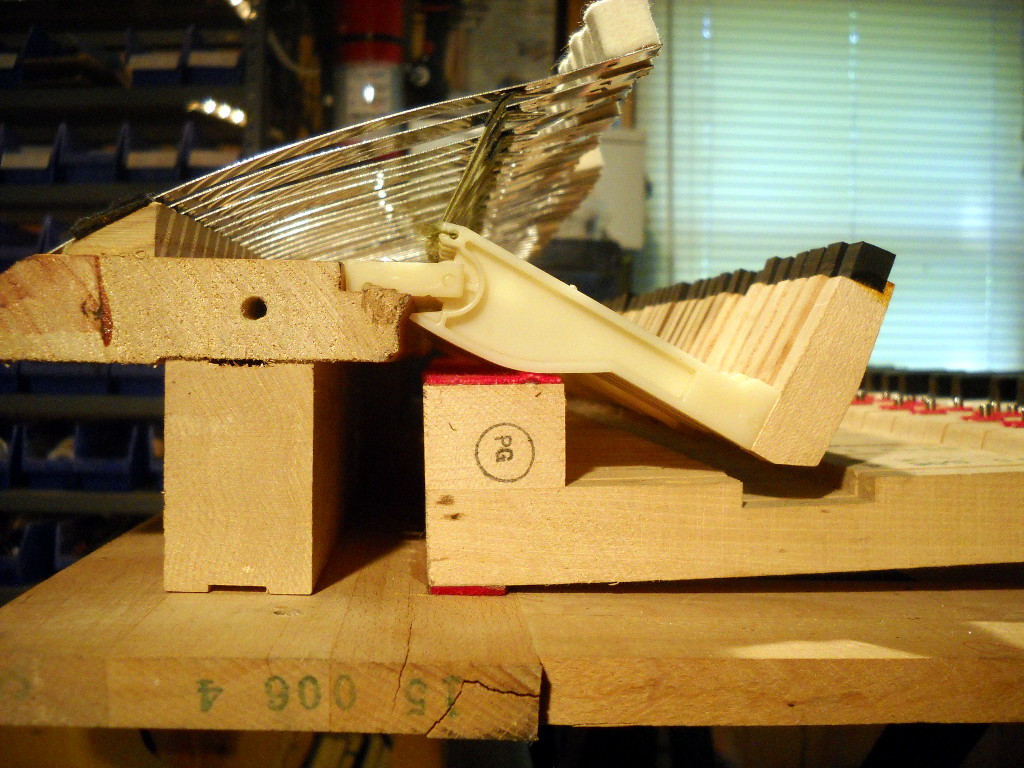
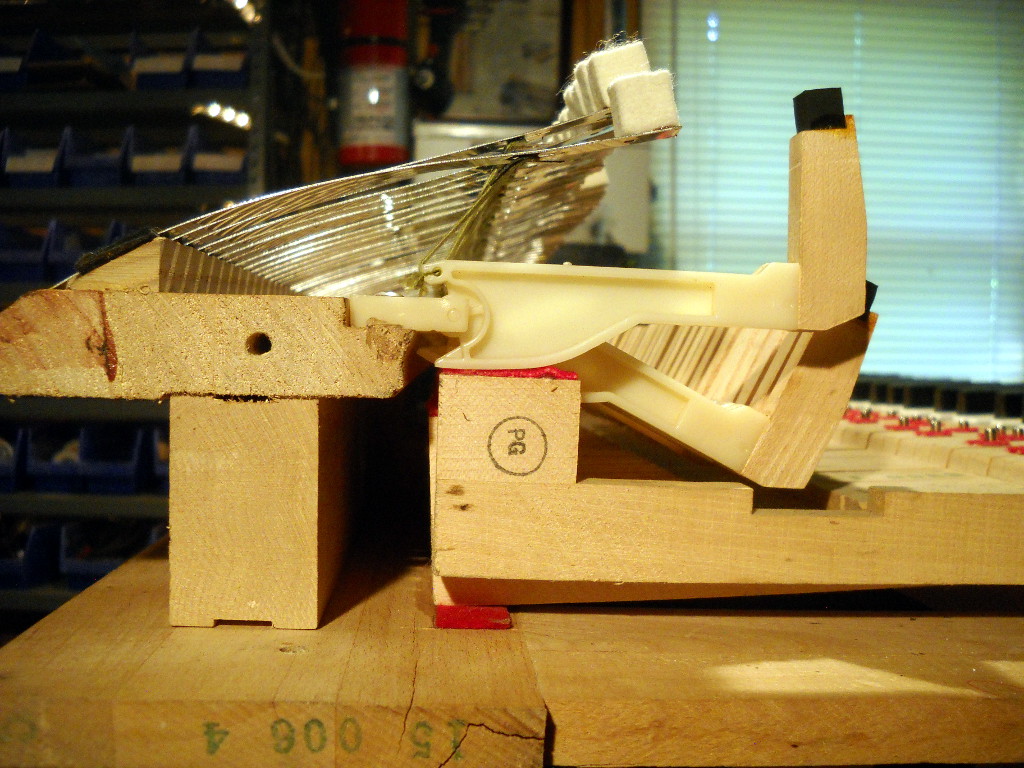
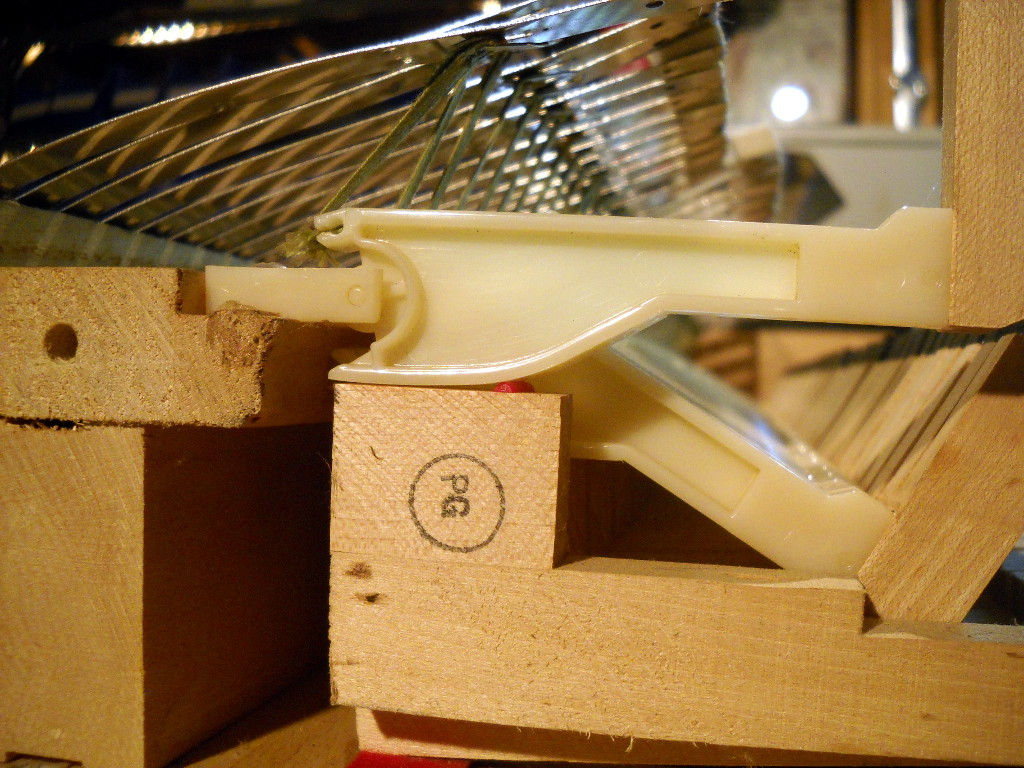
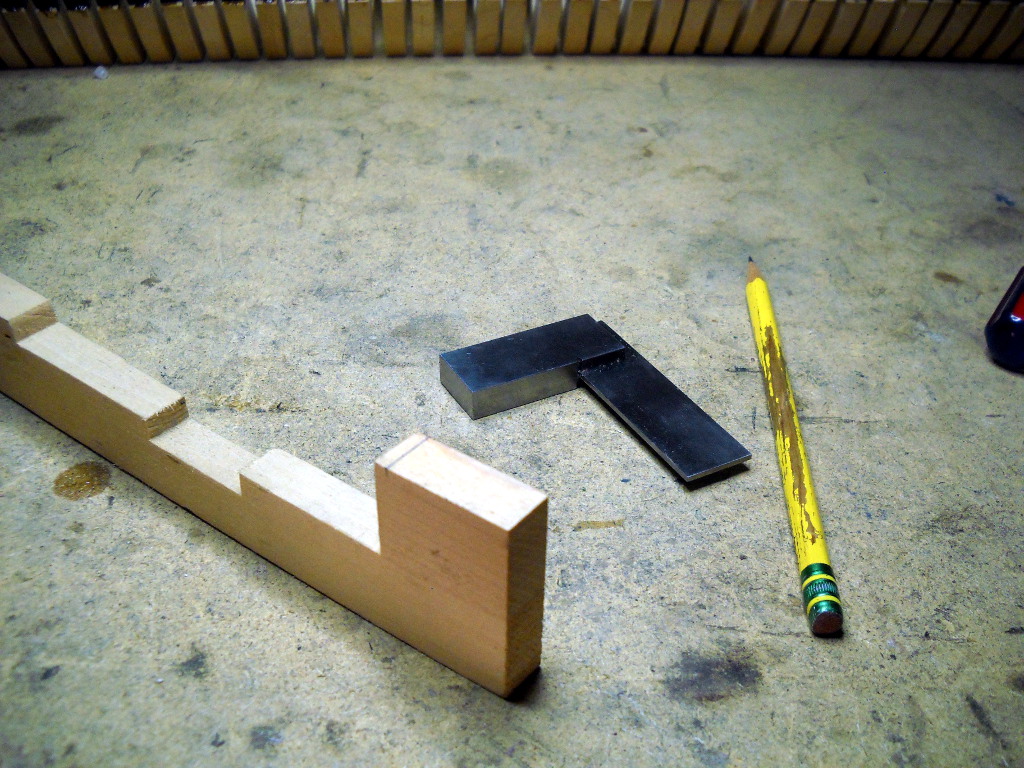
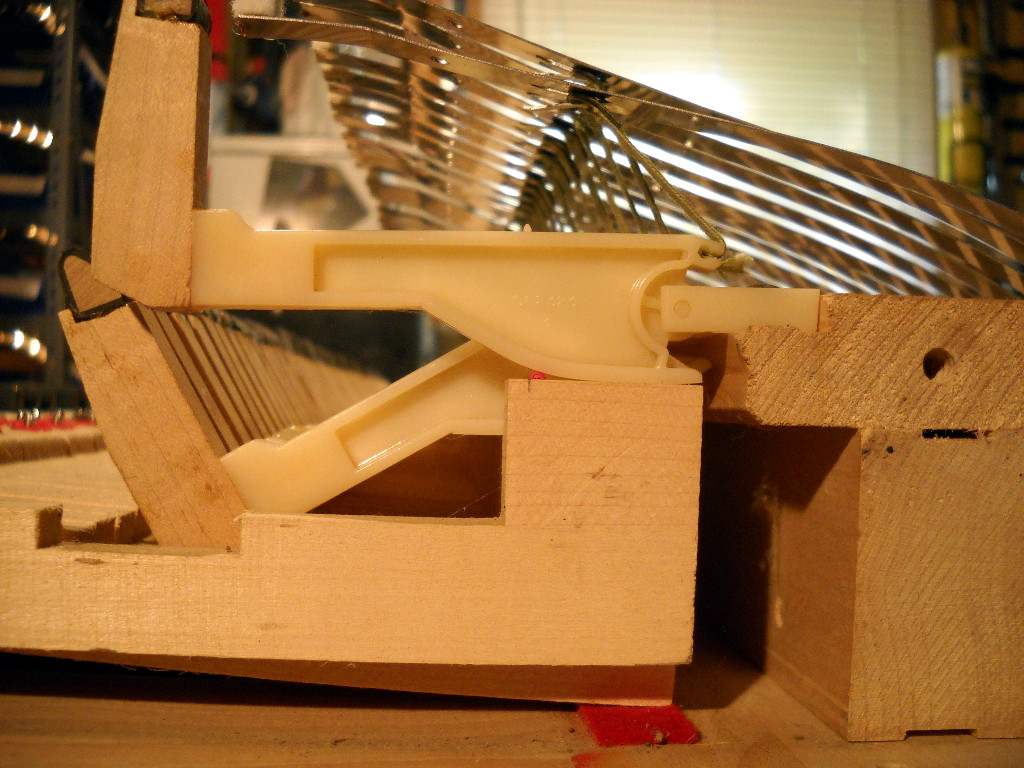
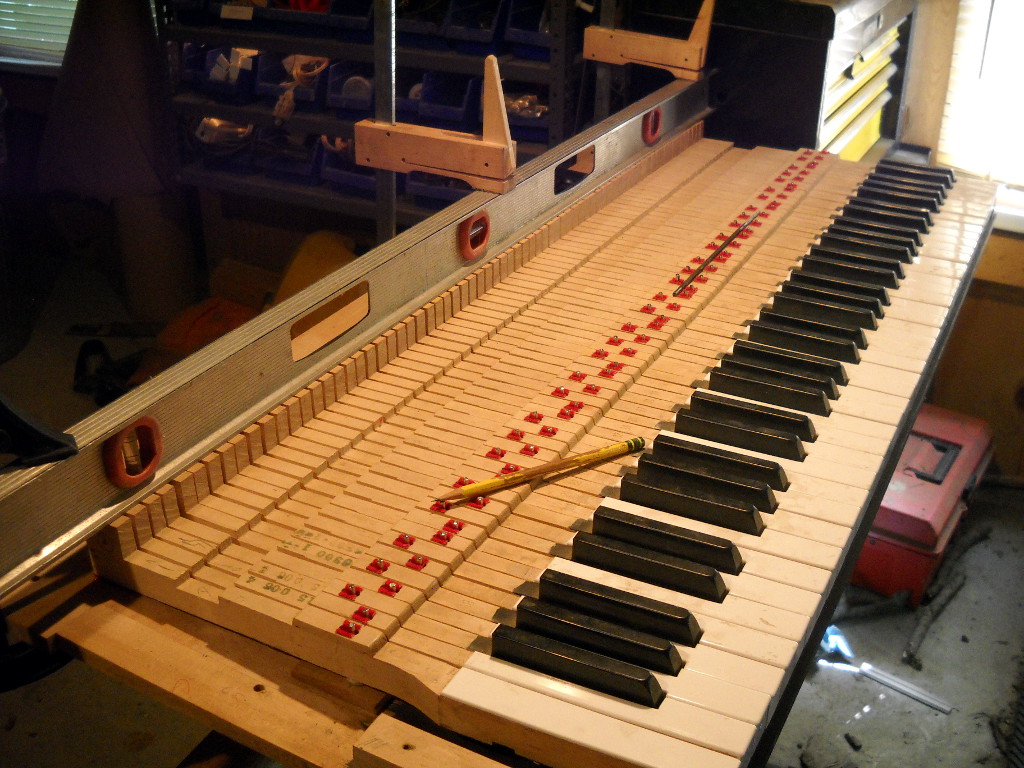
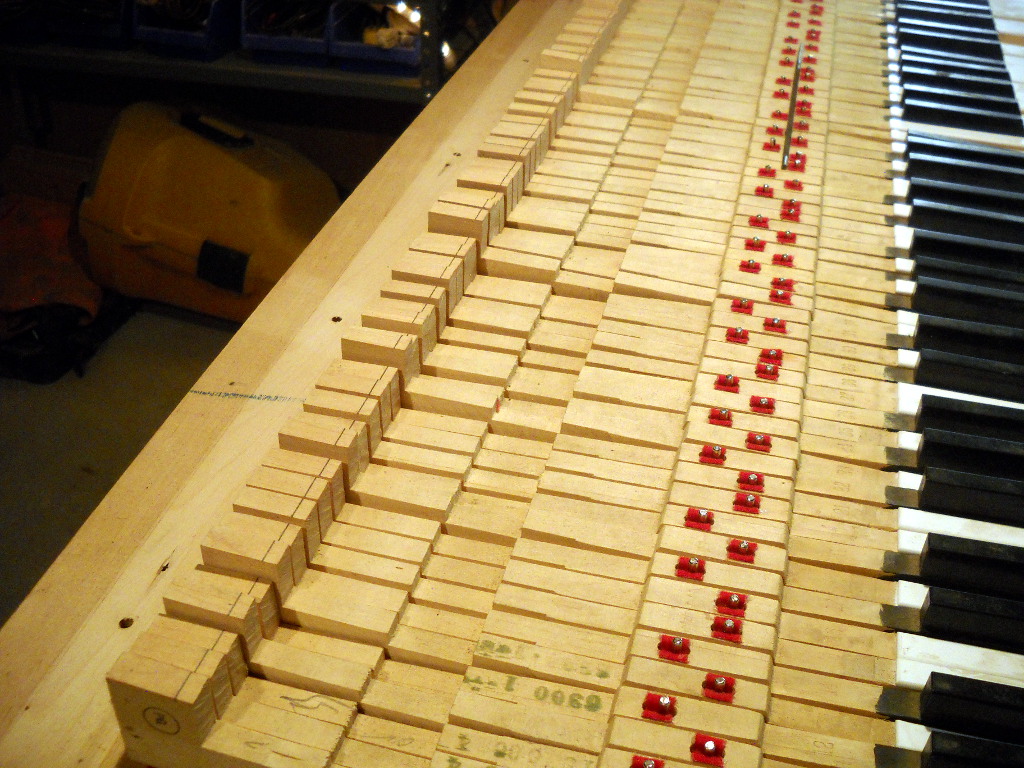
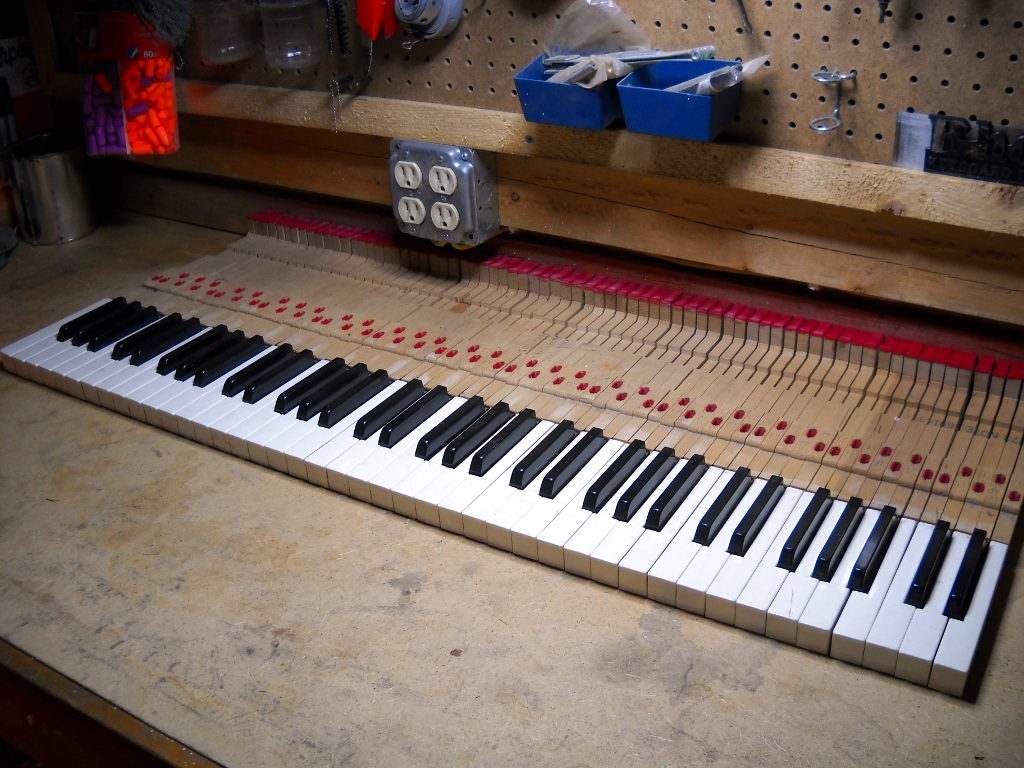
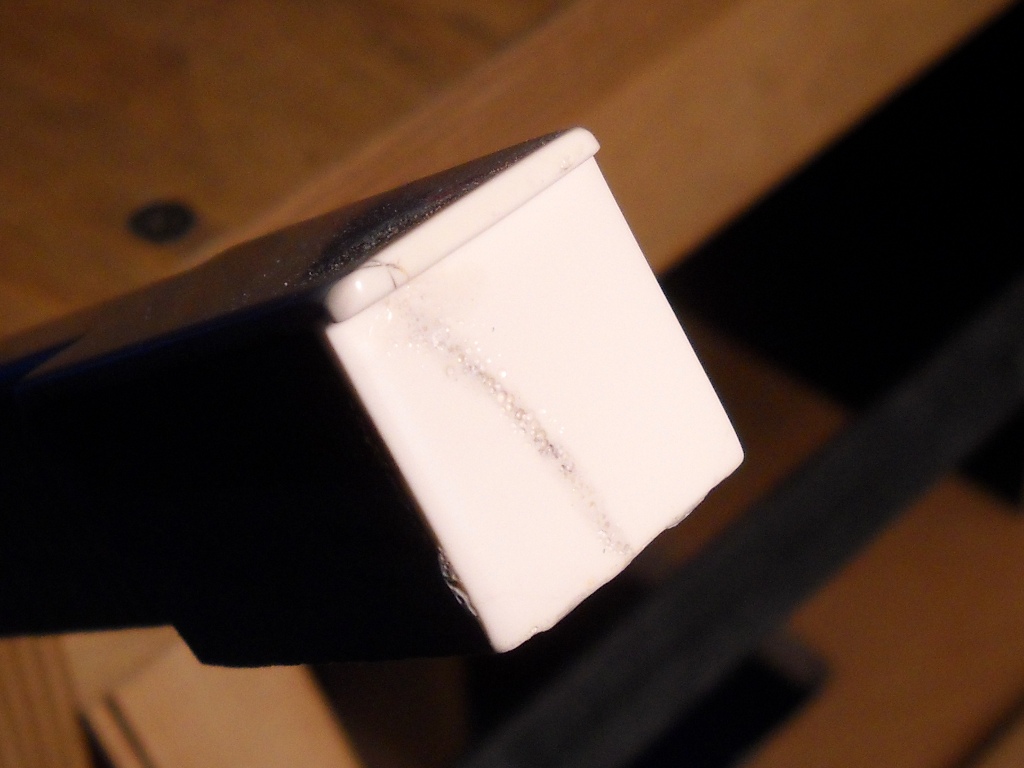
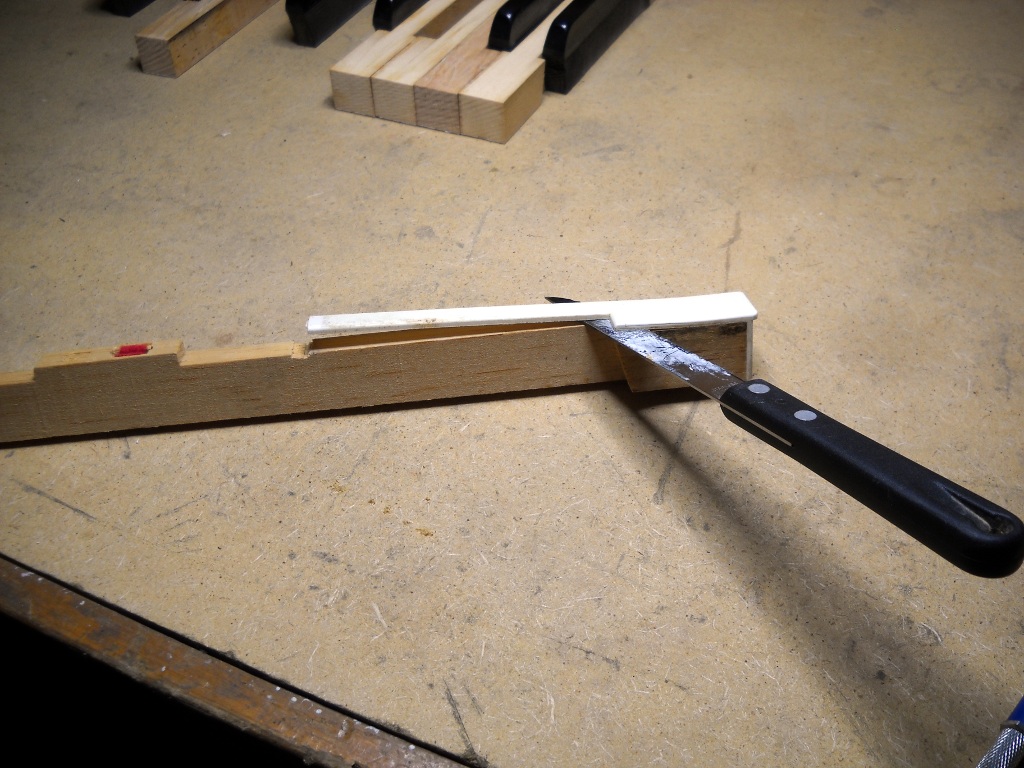
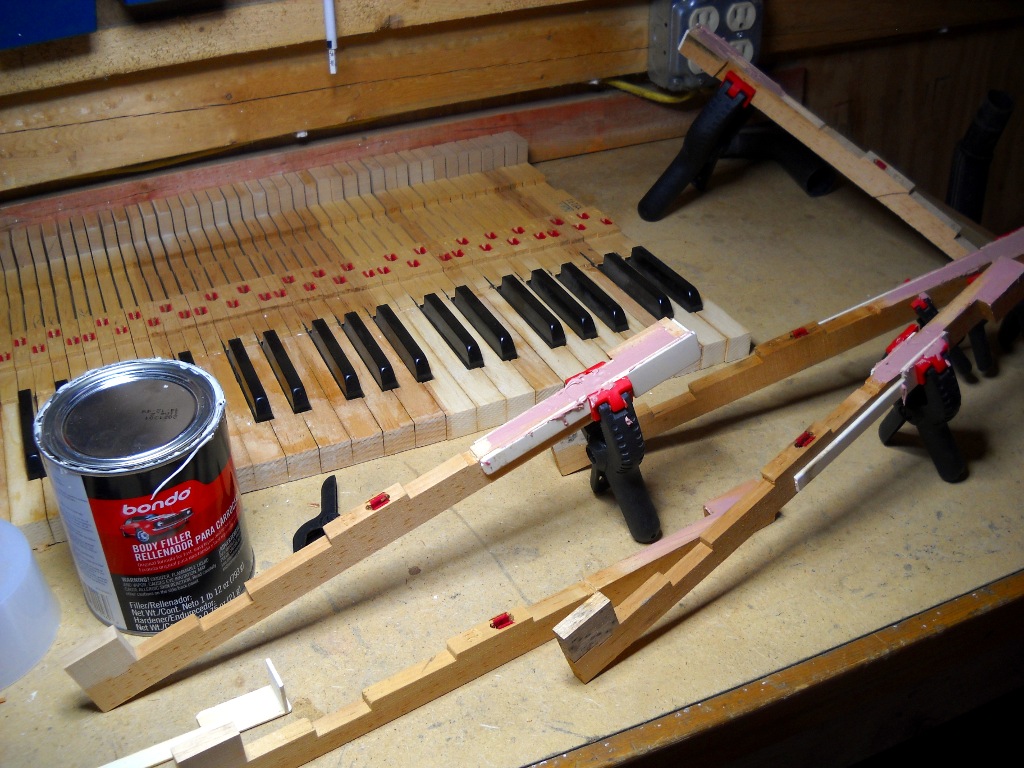
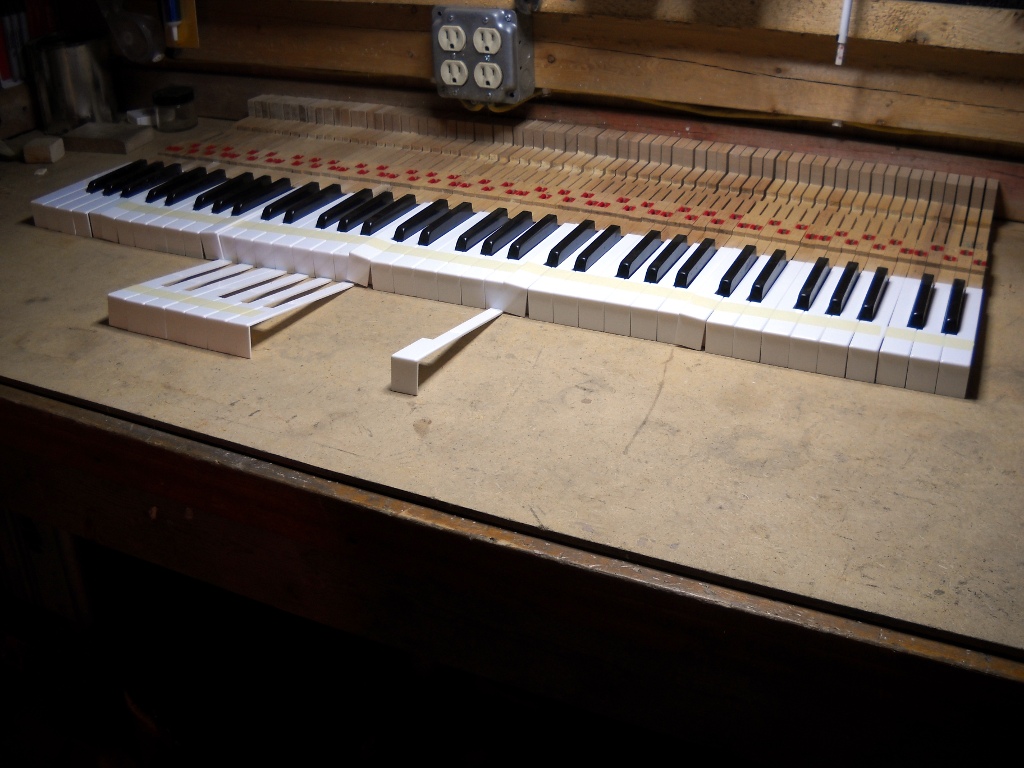
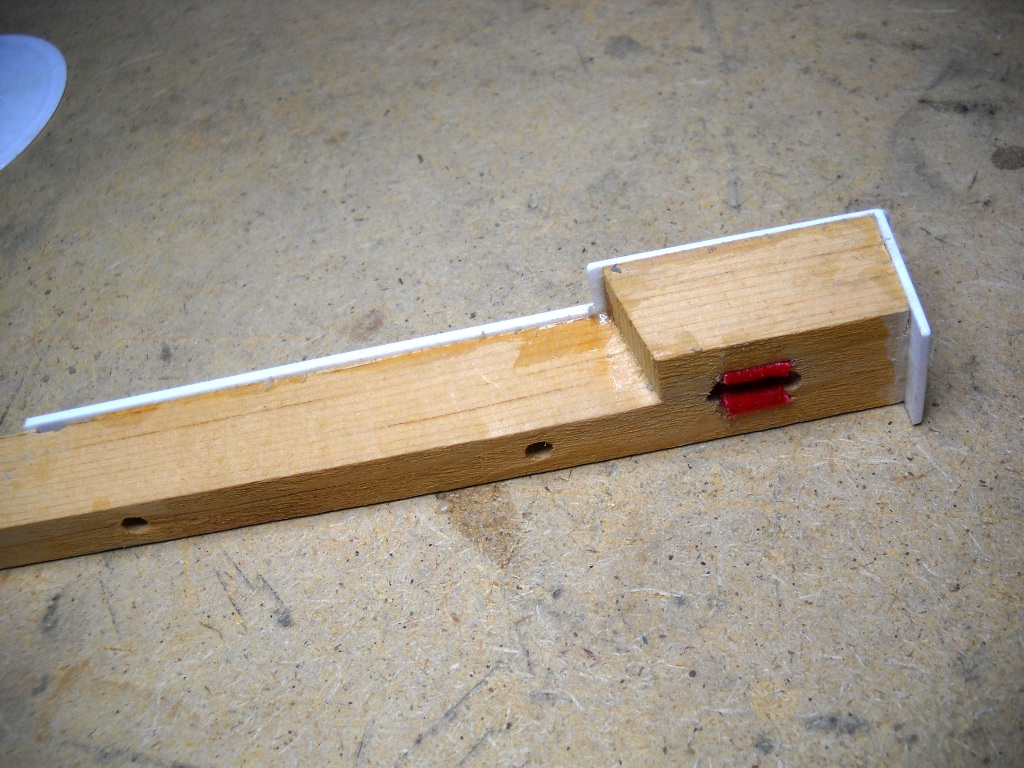
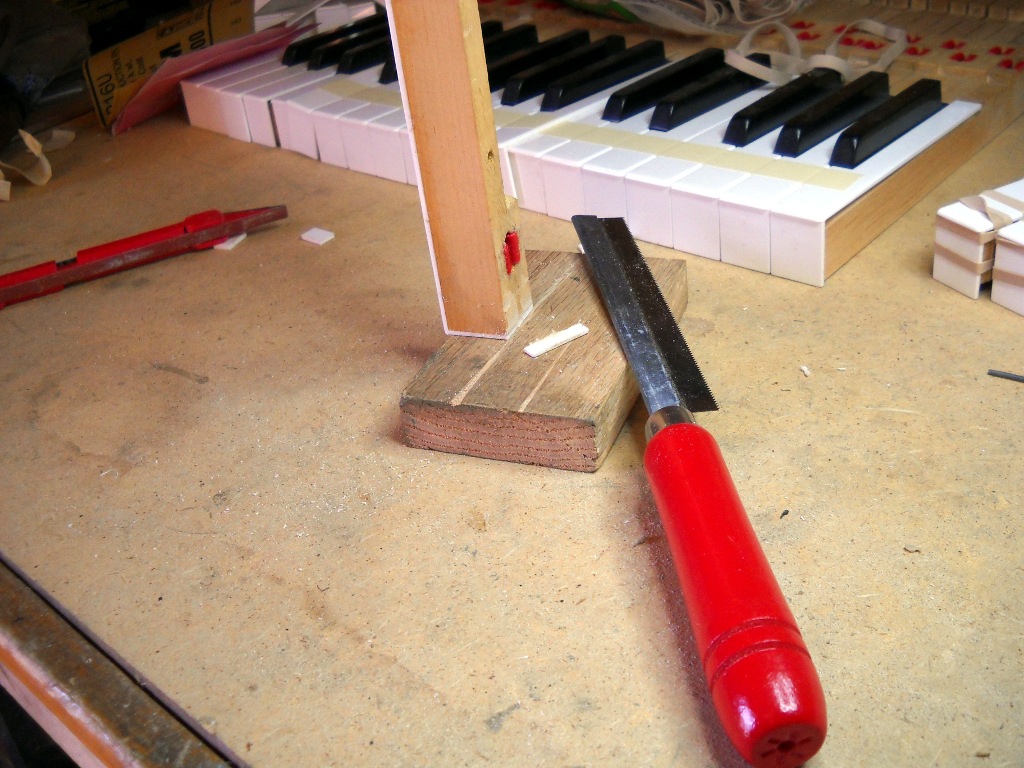
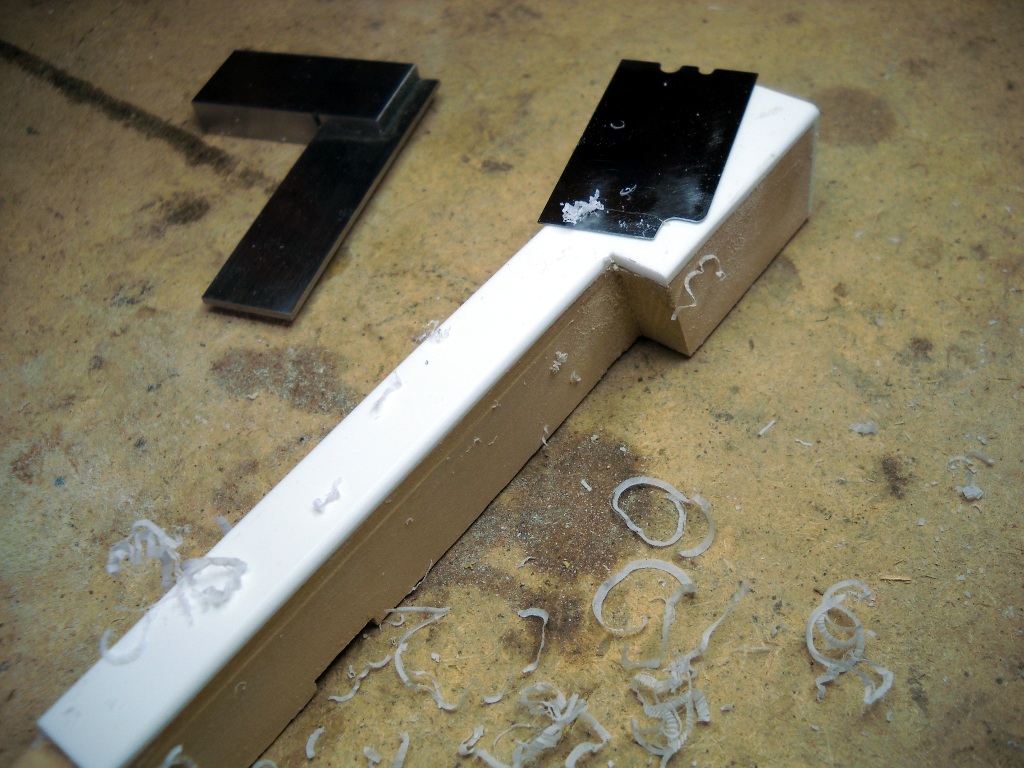
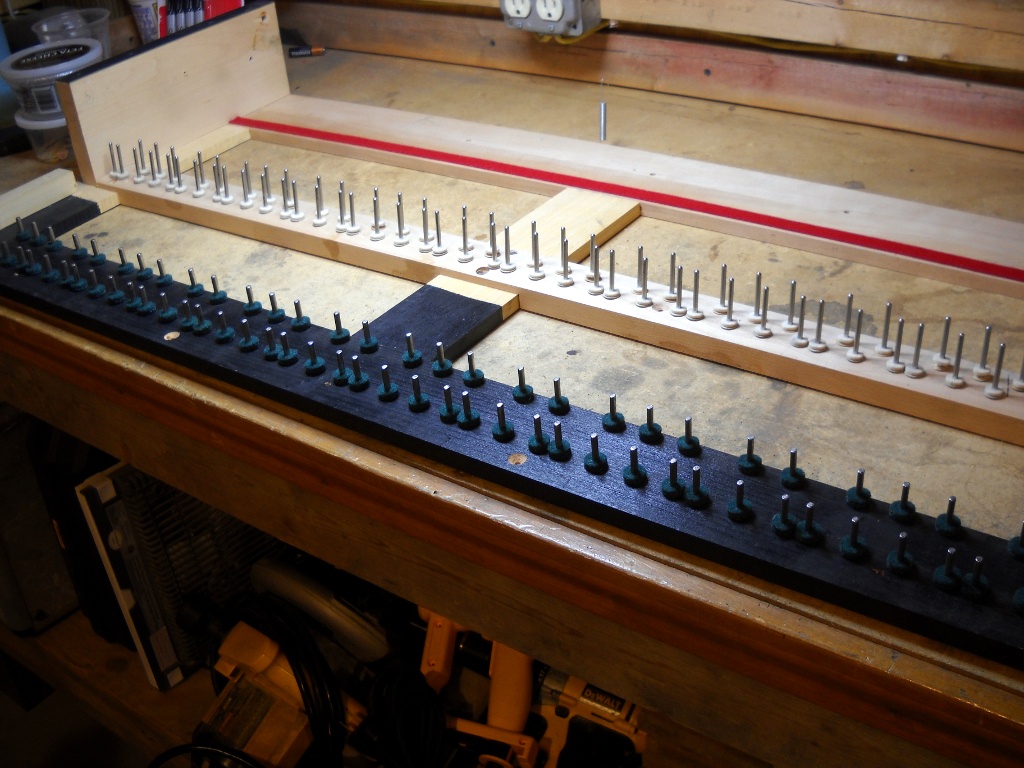
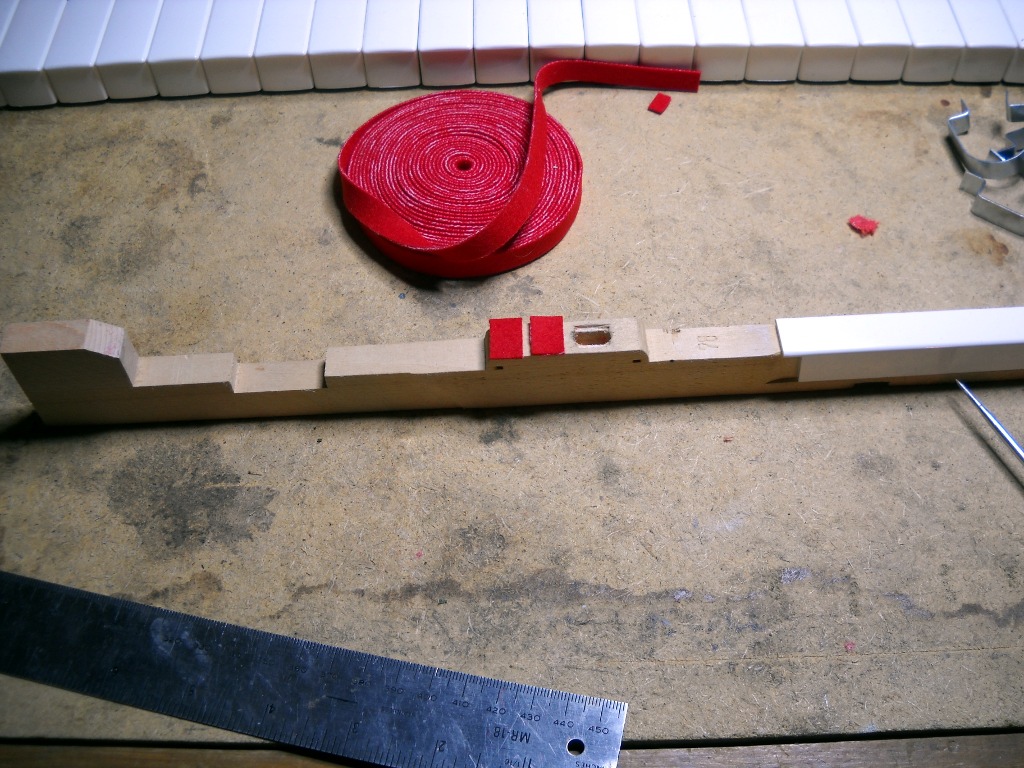
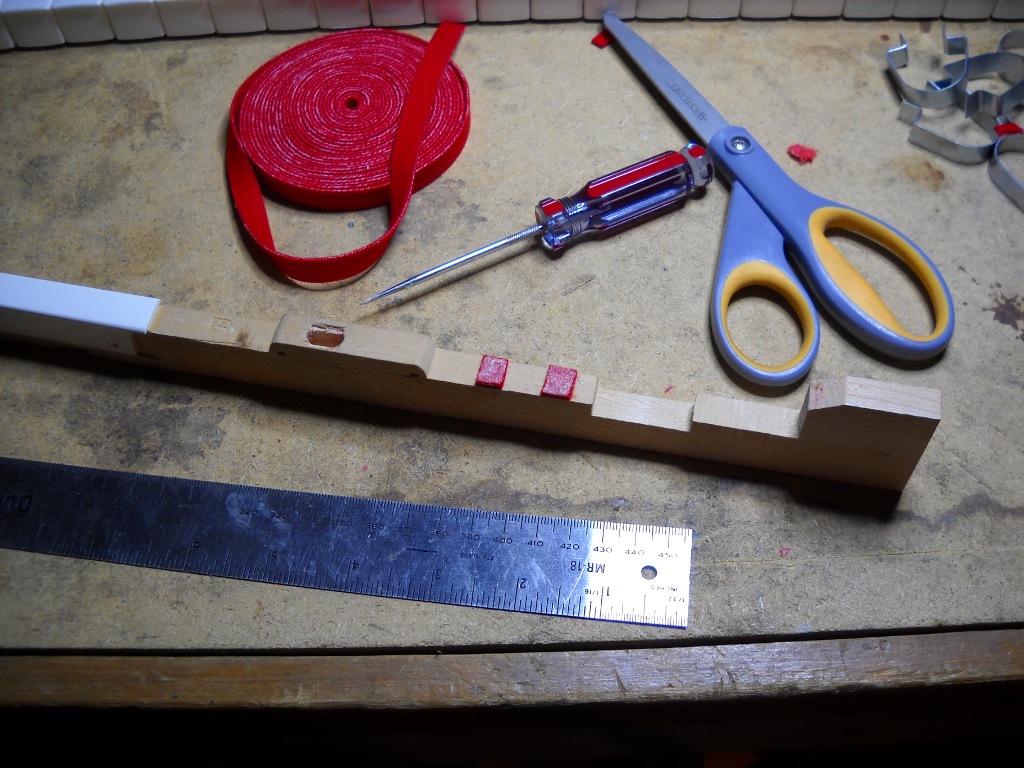
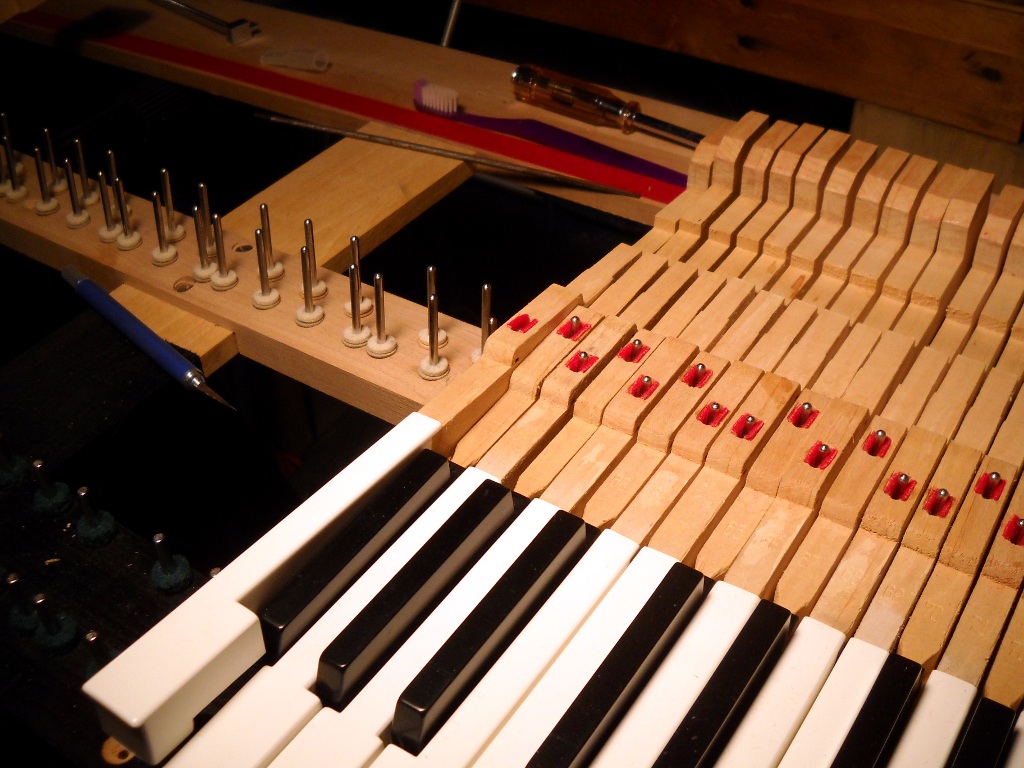
Changing the shape of the pedestal with this modification affects the action in two ways. At rest, the hammer cam sits atop the small bump, reducing the contact patch and thus the amount of friction between the cam and the pedestal and changing the leverage involved in causing the hammer to move upward. After the tine strike, the bump helps enforce the action’s stop-lock mechanism by adding a second point of contact to more effectively catch the hammer on its rebound. It is this stop-lock position that I use to find the appropriate location for the bump. To make the job easier on my current 1974 piano, I first removed the harp supports giving me a clear view of the hammer and pedestal. With the first key held down and the hammer at stop-lock, I placed a plastic bump on the front of the pedestal and pushed it back until it made contact with the hammer’s cam. I then marked the side of the pedestal with a pencil and removed the key from the frame to strike a guideline across the face of the pedestal. Of the two sets of components, the hammers maintain a more consistent line across the length of the piano than the key pedestals. Installing the plastic bumps by measuring a set distance from the edge of the pedestal will likely result in a more irregular response than if the measurement was made relative to the action rail. In order to draw a reference line across the entire set of keys that would remain parallel to the action rail, I located the proper position of a second bump at the opposite end of the keyboard from the first. Then  the action rail was removed and with it the hammers and dampers that blocked access to the rest of the key pedestals. With what in my shop passes for a straightedge clamped down at the marks made on the first and last keys I drew the lines across the remaining pedestals.

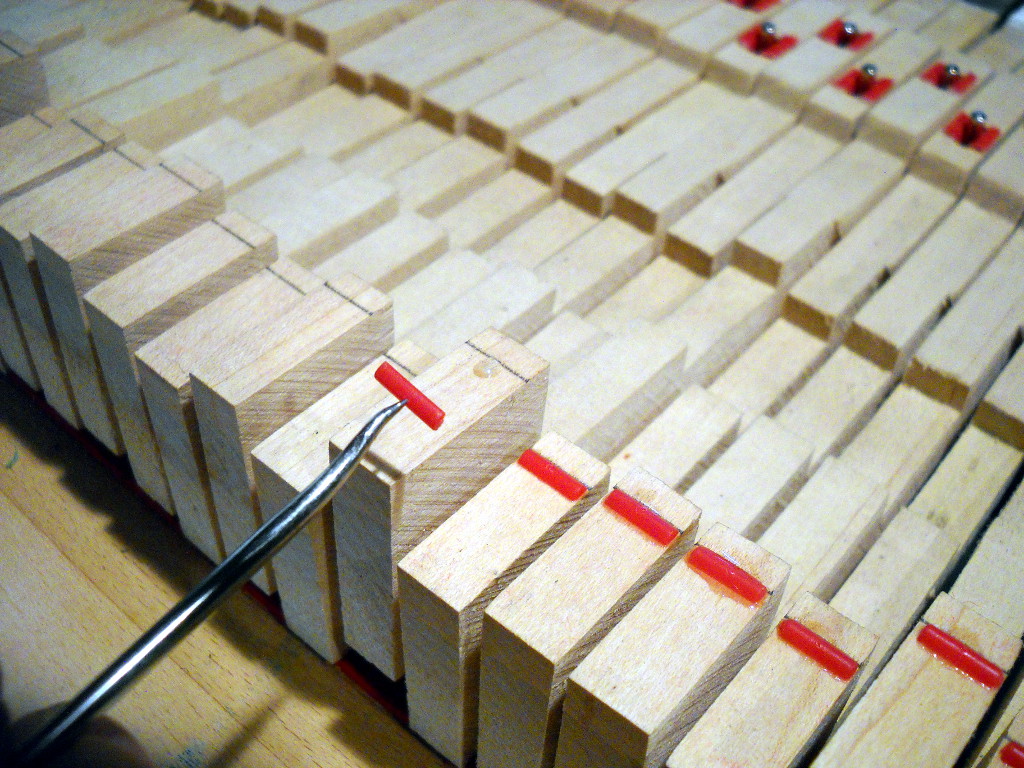
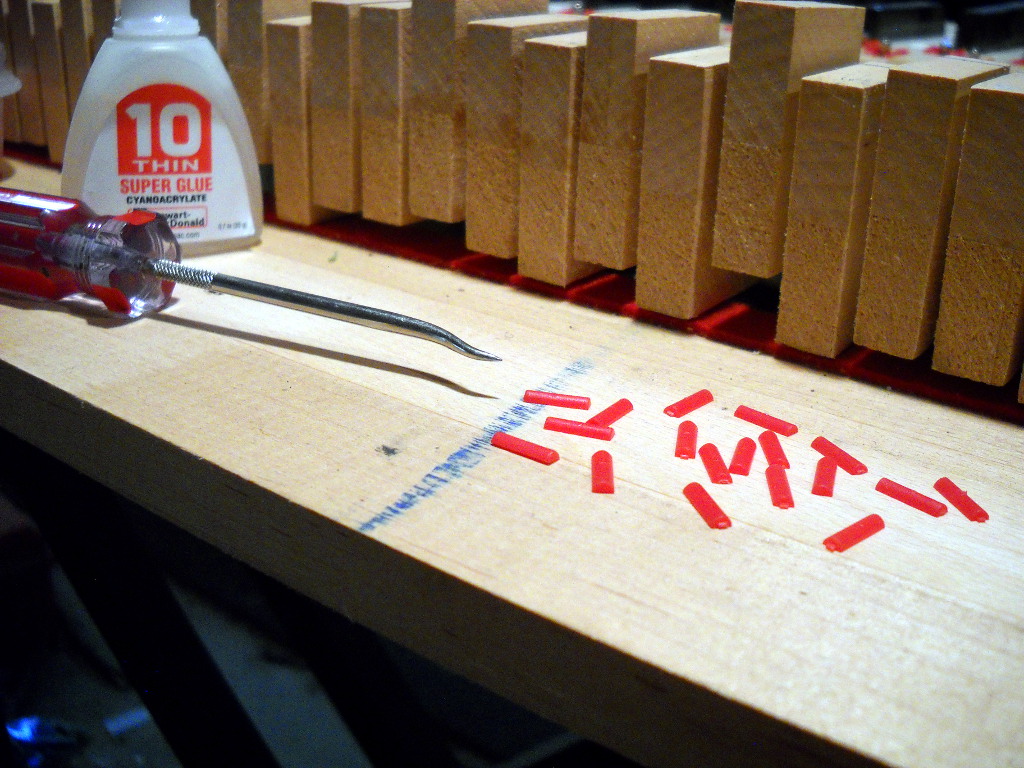
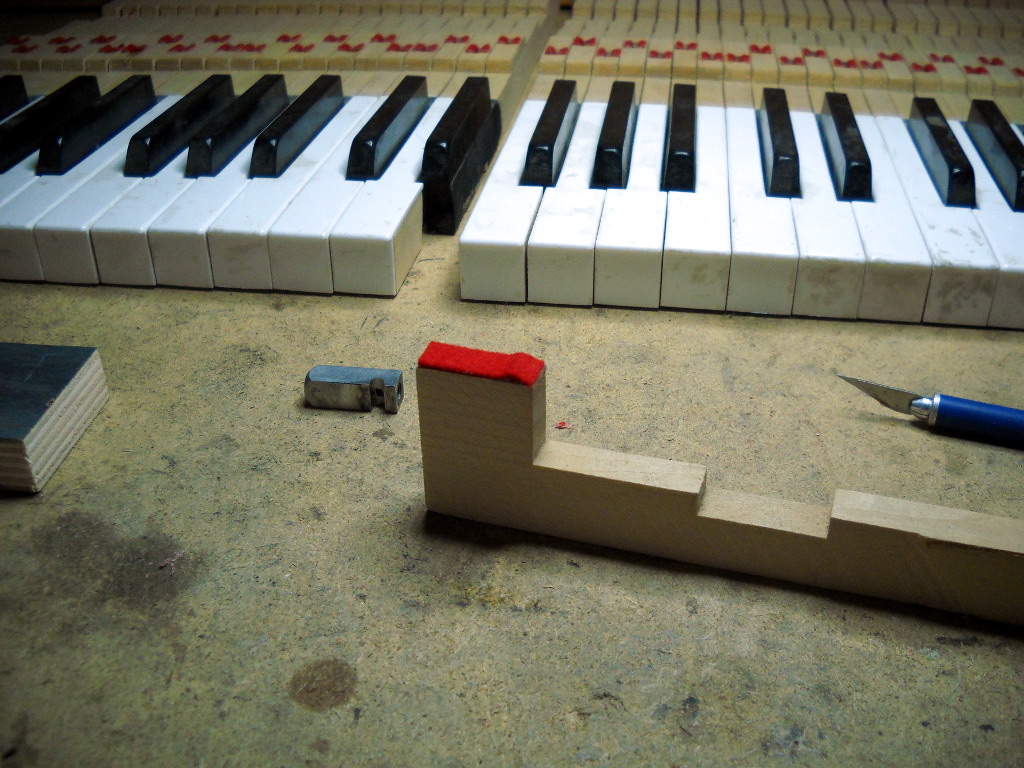
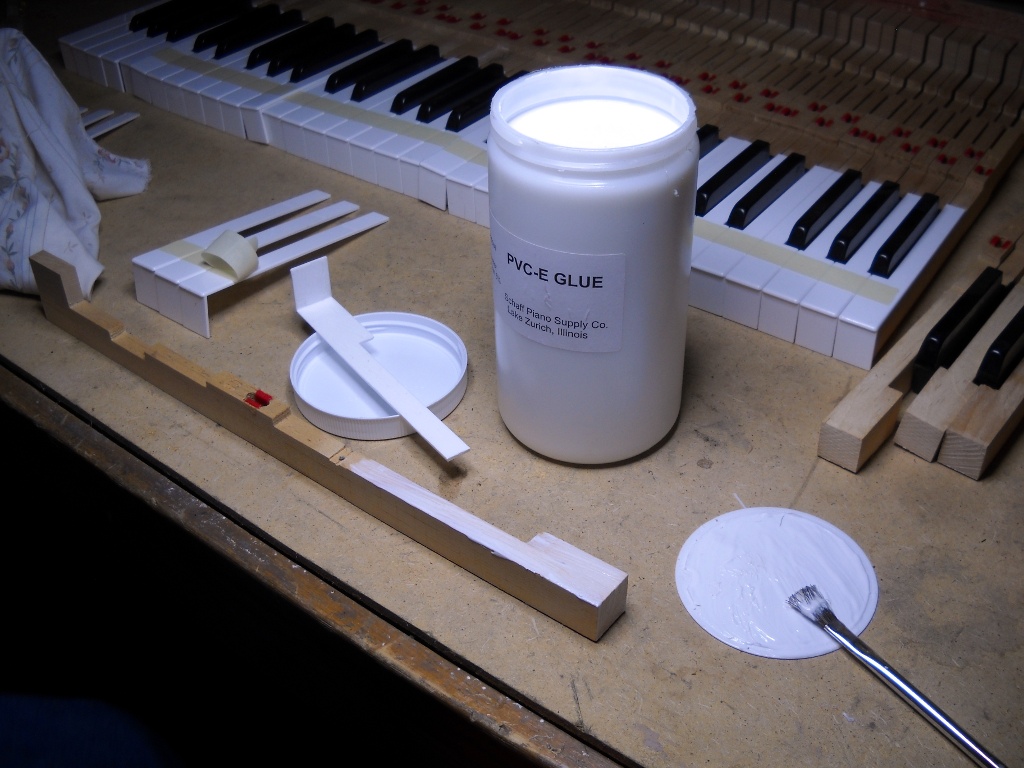
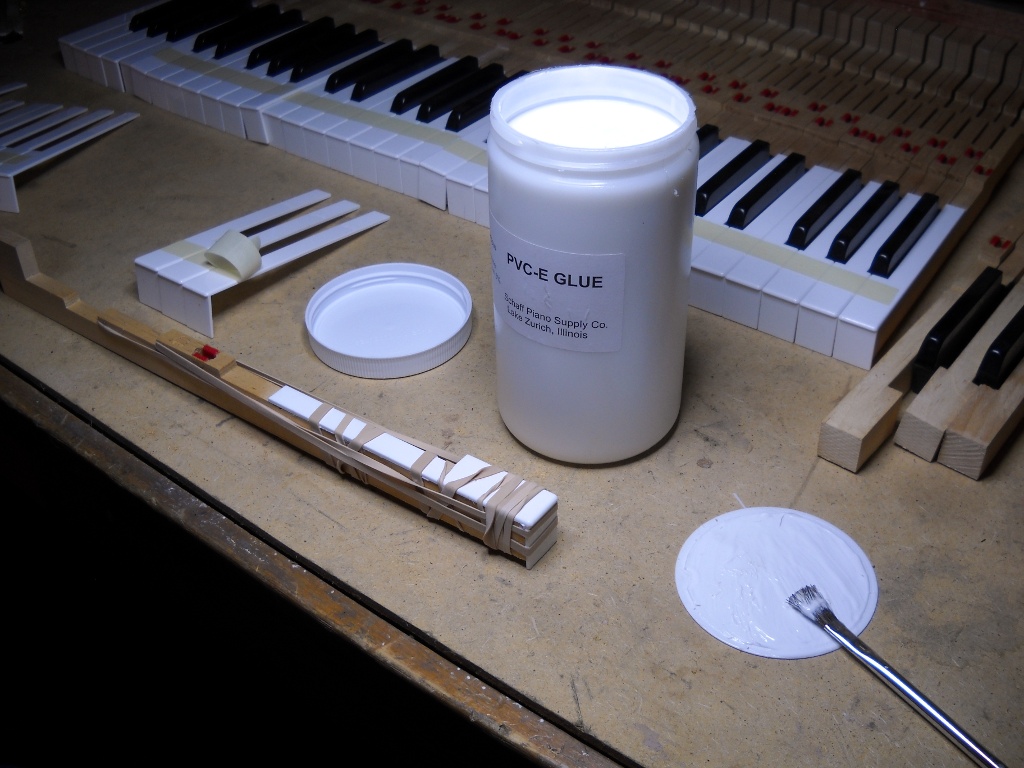
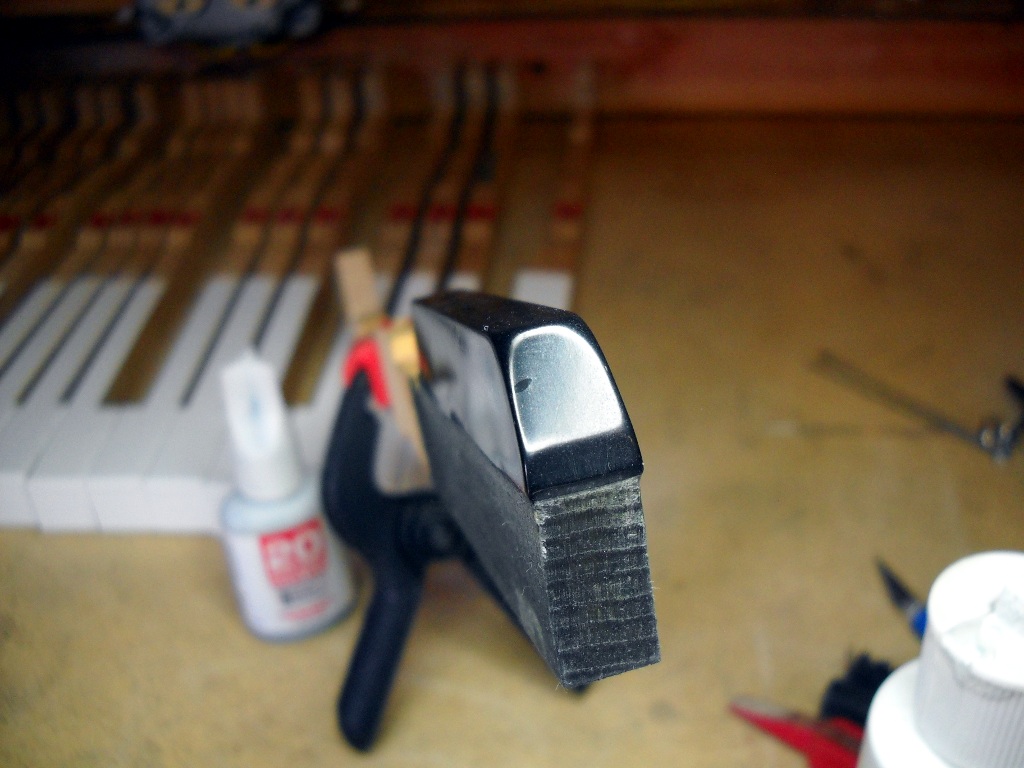
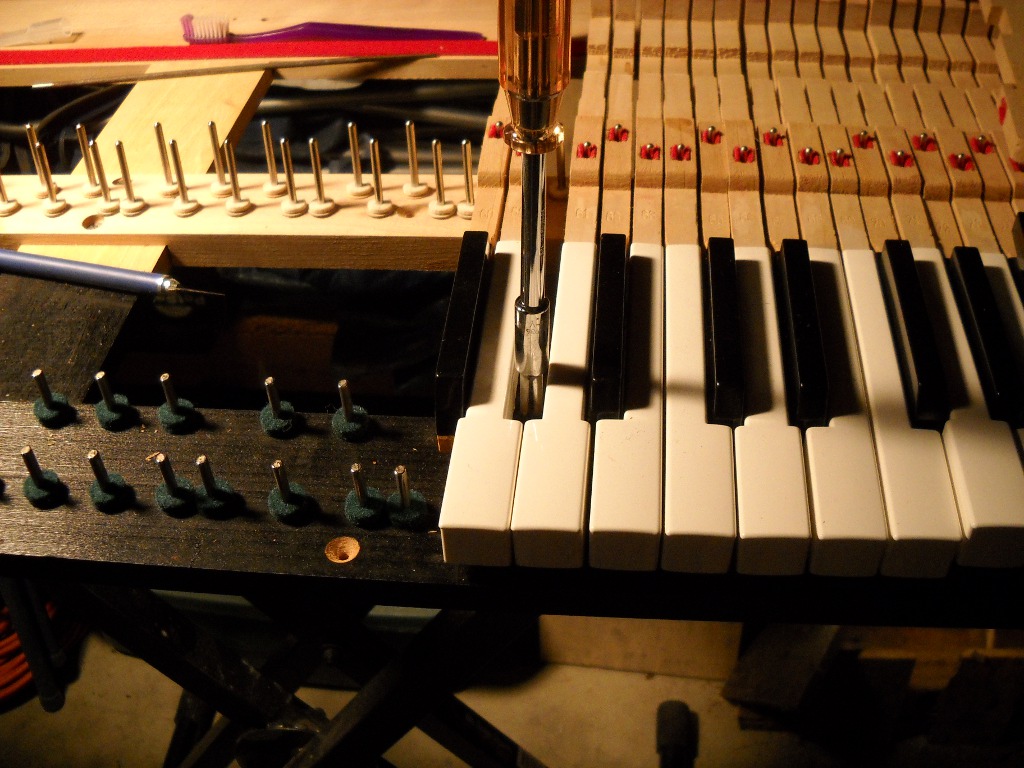
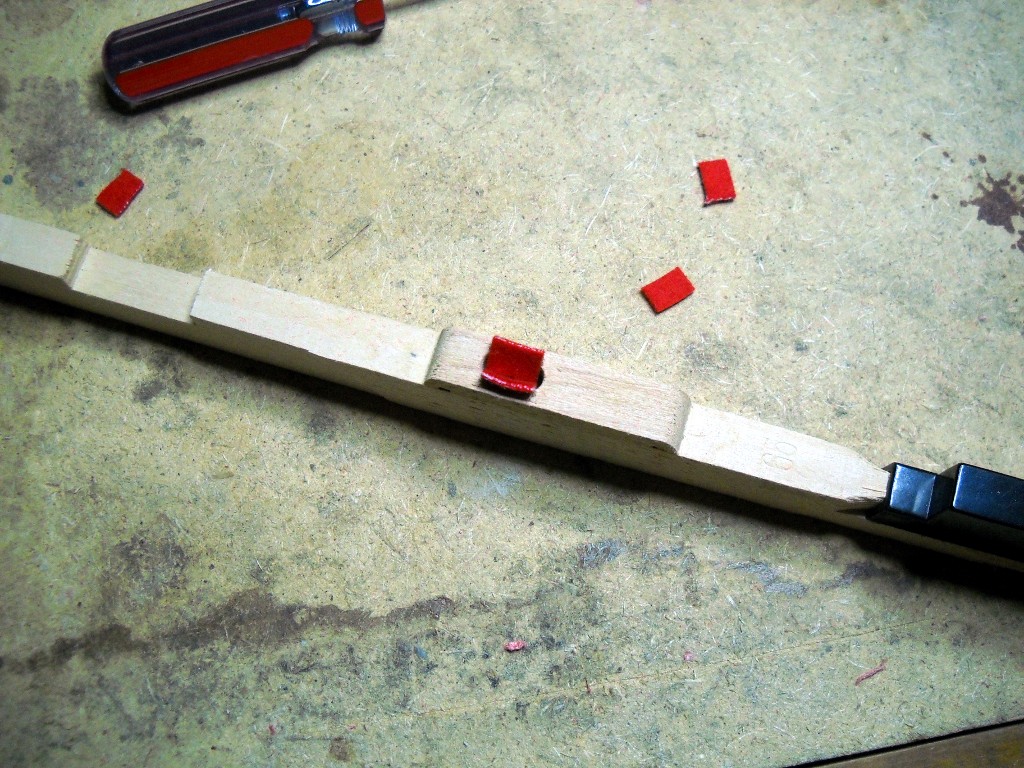
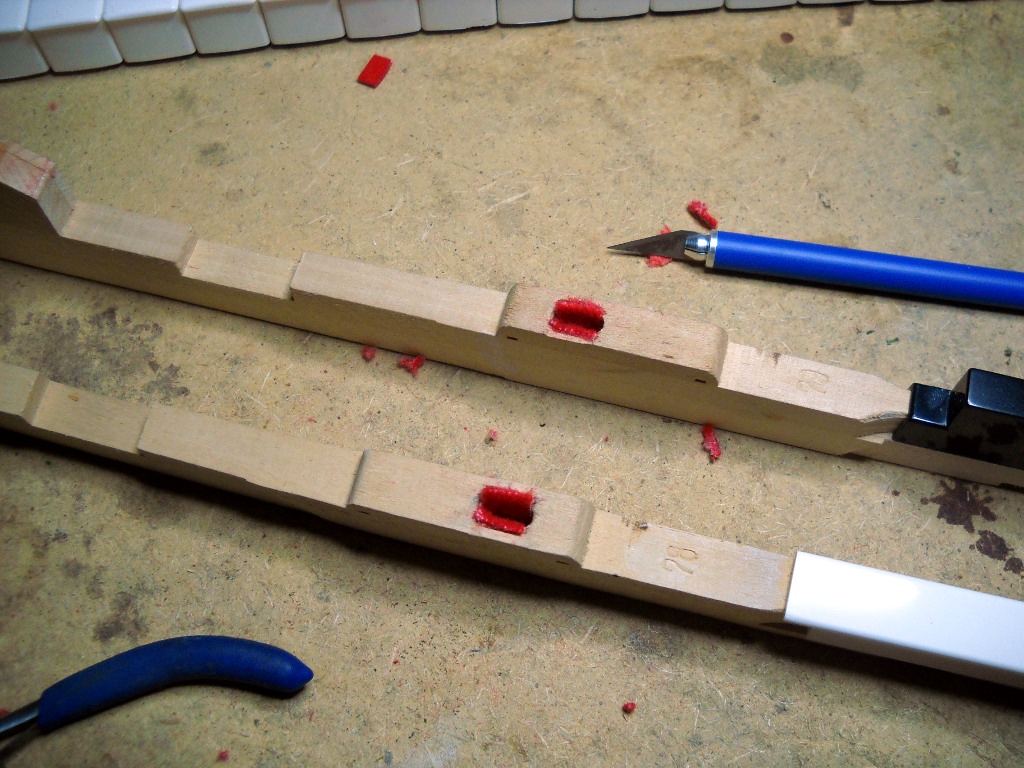
Since the felt to be glued on top of the pedestal provides all of the holding strength needed to secure the bump in place, I use only a very light application of thin super-glue to position the plastic until the job is complete. A small, sharp awl poked into the top of a bump provides just enough grip and control to carry and place the piece while still allowing it to be released when the time comes.

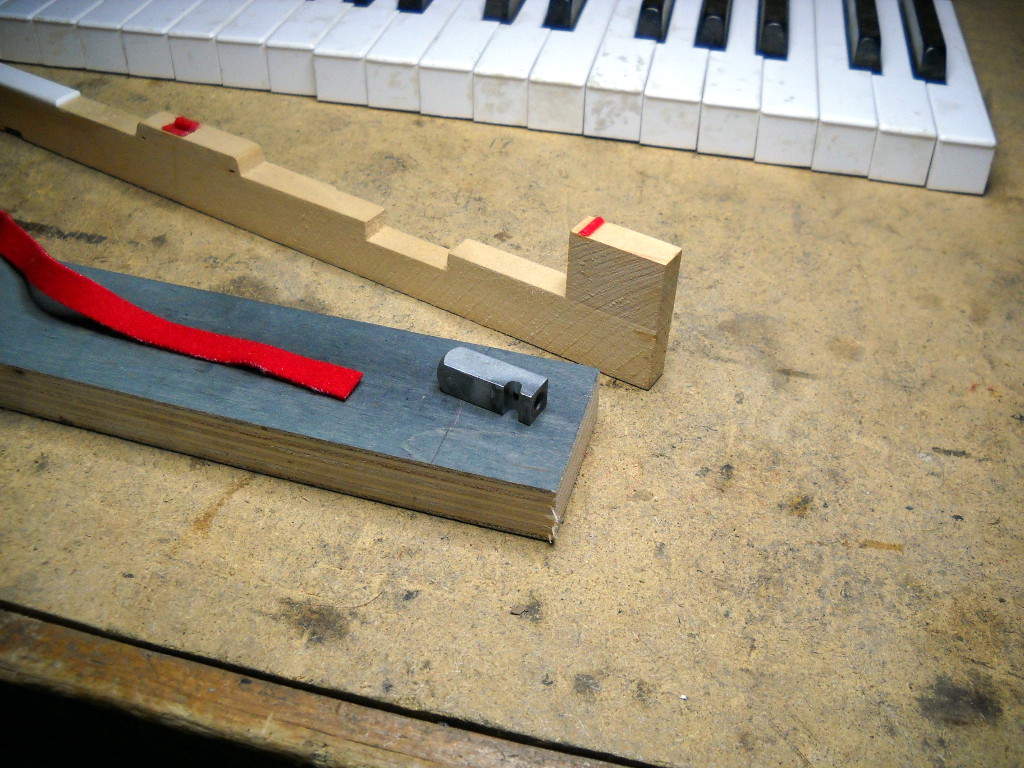
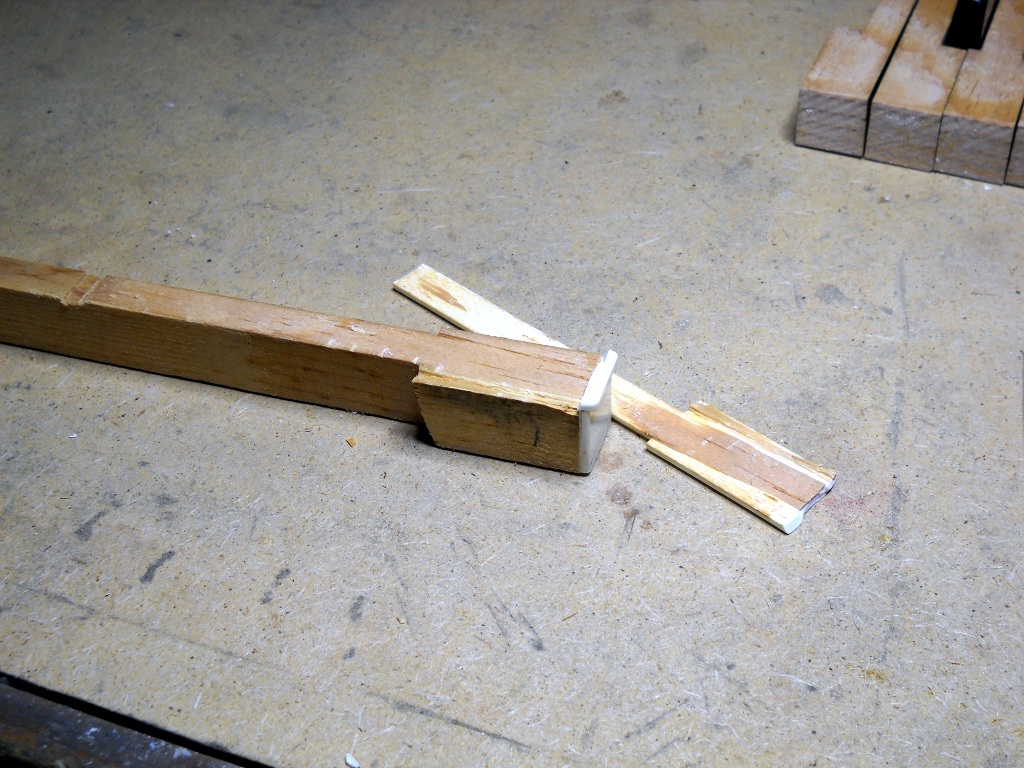
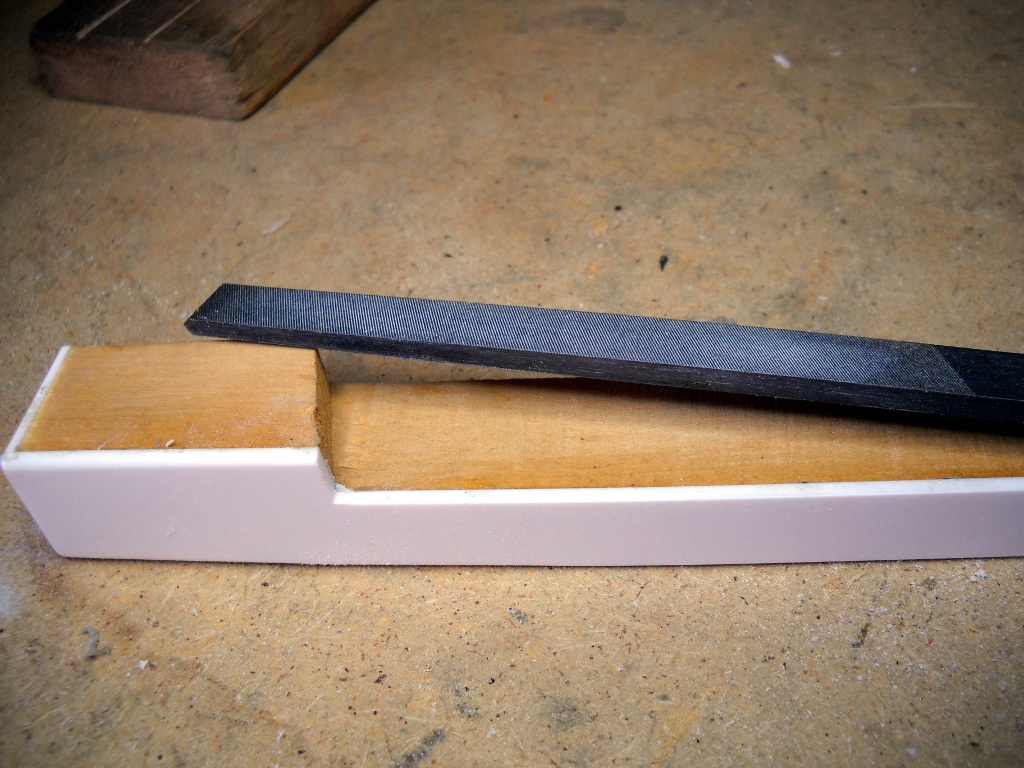
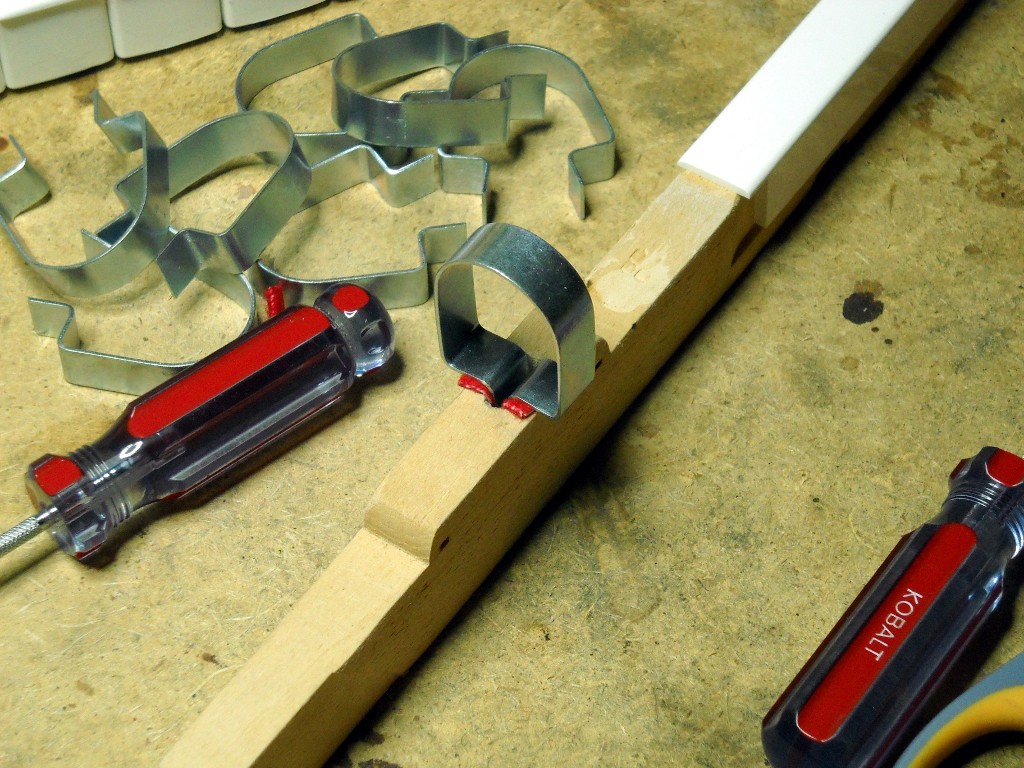
I don’t know what type of glue was used at the factory to install the various pieces of felt that are included with each key. Past experiences removing the material have suggested that what was used to secure the pedestal felt is not the same adhesive used on the guide pin bushings. Though I’m certain it wasn’t used on any part of a Rhodes at the factory, I’ve opted for hide glue for both the bushings and pedestal felt. Hide glue sets quickly and will not allow the parts to creep over time. A clamping caul made by cutting a notch into the side of a spare tine block ensures a tight fit around the bump.

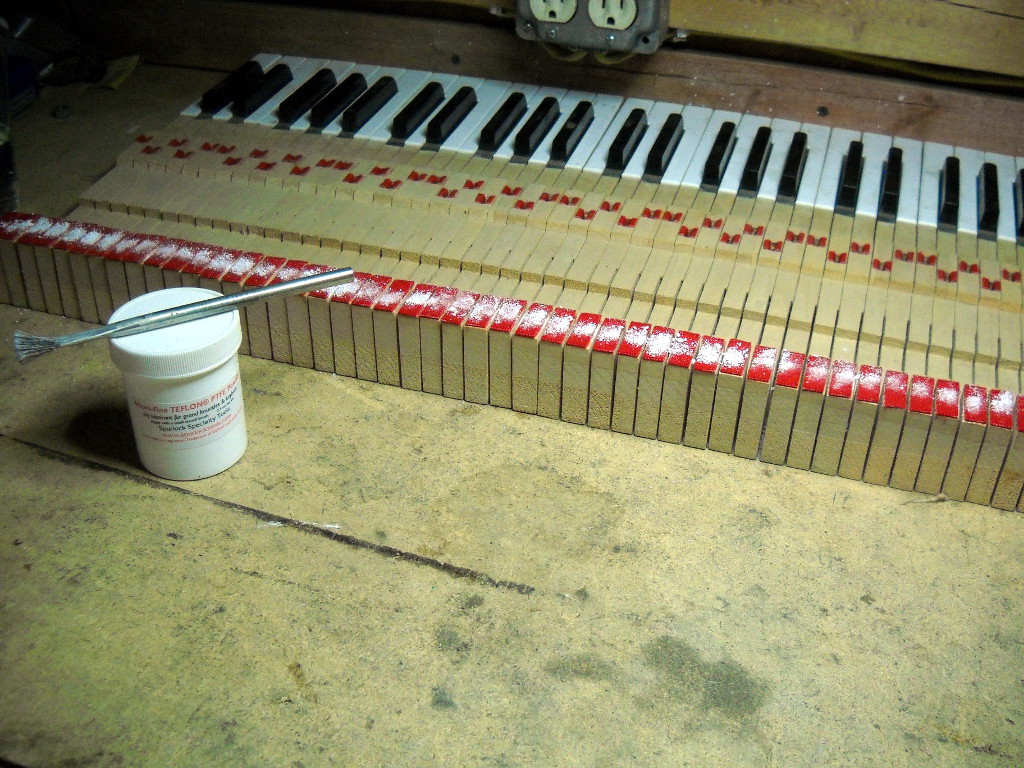
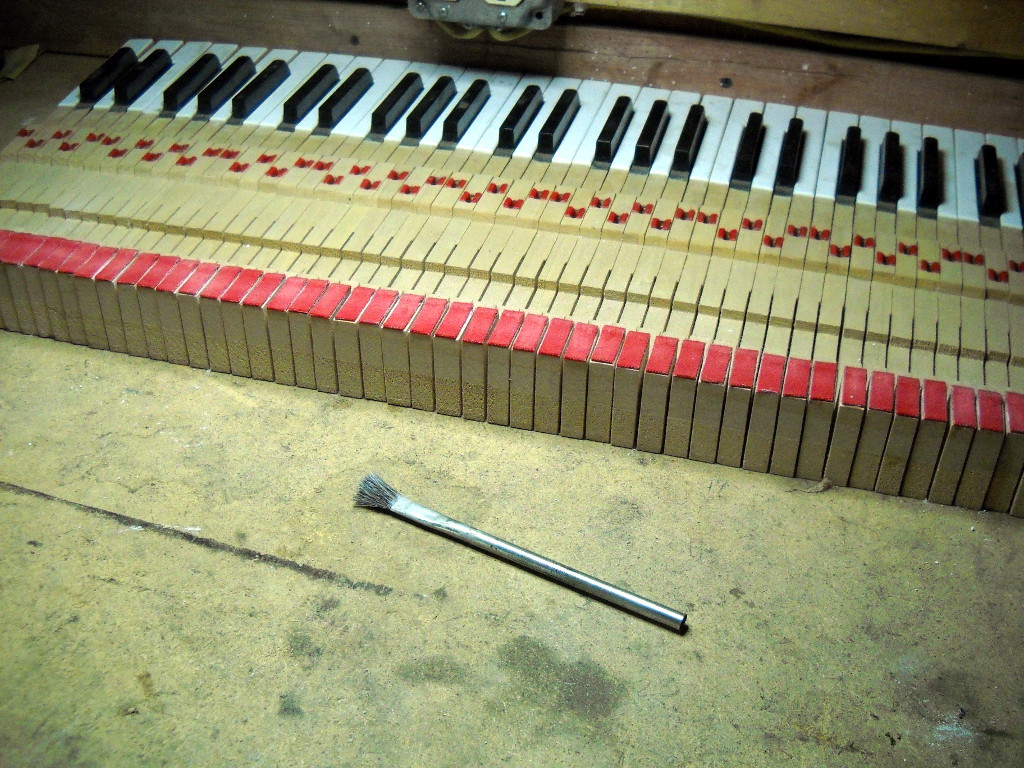
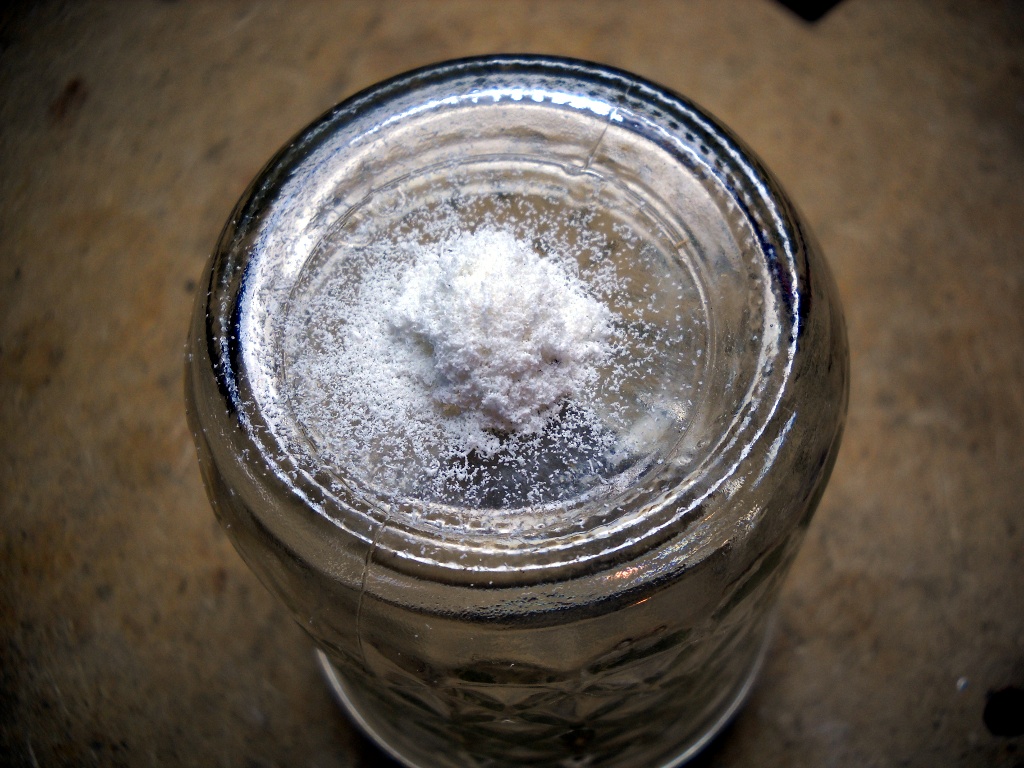
The official shop manual recommends using silicone spray to lubricate the felt after installation is complete. The problem with such a lubricant is that it typically includes acetone. The acetone soon evaporates but until it does, it can soak through the felt and attack most glues. Also, if the key is installed before the acetone has completely evaporated, it will react with and begin to melt the plastic hammer cam. To avoid these issues, I use dry, powdered Teflon sprinkled on, then brushed into the felt.

Replacing Keytops

I guess I got lucky with my first three pianos. None of the keys had sustained damage that couldn’t be corrected with abrasives and some elbow grease. According to a regular on the Electric Piano Forum, evidence suggests pianos from the year 1976 suffer from keytops that degrade more quickly than those from other years. I’ve currently got three pianos from that year and two feature craze lines on nearly every key while the third has held together in decent condition.

Before committing to replacing an entire set of tops, I first investigated options for repairing the originals. The superficial damage I’d repaired up until then had all been shallow enough that it disappeared after a little sanding. The crazing that infected these keys ran far too deep to make that a viable option. The Rhodes Service Manual provides a recipe for making white glue to use when replacing keytops. This suggested to me that I might be able to devise a similar substance to use as gap filler. My plan was to excavate a crack into a wide furrow that could then be back-filled with my concoction. The pigment for this filler paste was to be provided by ground material from an actual keytop so I first procured a set of sacrificial keys from ebay. After developing several questionable combinations of solvent, powdered keytop and adhesive, I finally concluded that this was not going to be a practical solution. Even when I was able to mix a batch that set up properly, my closest color match still left a shadow that was just as obvious as the original crack.

An old kitchen knife made a good tool for removing the original tops.1 Although the plastic mostly came up easily, on several keys it insisted on taking some wood with it leaving voids that I later had to fill with Bondo.2 The replacement keytops, manufactured by Schaff Piano Supply, were not exact matches to the originals. In addition to being intentionally oversized to fit a range of key sizes, the overhang in front was less pronounced than on the factory keys. After being glued down, the tops could be trimmed to fit the keys but the shorter overhang would have to do. They’re sold in sets of 52 which provided a few spares in case the first installation attempts didn’t go my way.

The new keytops were attached using PVCE glue. Not at all like PVC glue used for plumbing applications, PVCE looks and spreads like household white glue. It excels at bonding porous to non-porous surfaces as when attaching plastic to wood. The glue was spread thinly across both the key and the top and the two parts were joined immediately. Excess glue was squeezed out of the edges and wiped away with a damp cloth then the whole assembly was wrapped as tightly as possible with four or five rubber bands. The wet glue allowed the top to be repositioned but held well enough that it stayed put once properly located.

The tops were installed unaltered and later trimmed down to fit the key. First, the excess lengths of the tails and fronts were removed with a small handsaw. The heads fit the width of the keys perfectly but were far too long requiring their shoulders to be filed back quite a bit. Some of the tails fit more closely than others. Most of their edges were scraped with a rasp then finished with a smoother file to bring them flush with the sides of the keys.

At first, I referenced the underlying wood to determine where to cut and file each key but that resulted in uneven lines both at the tail ends and, more visibly, along the keys’ shoulders. Before proceeding, I remounted all of the keys on the keyframe and used a pencil and a straightedge to make reference lines that would remain consistent from key to key. This approach worked much better and the remaining keys maintained noticeably cleaner lines.

The tops were supplied with edges finished with a smooth chamfer. Unlike on the original keys, the new chamfer kind of dwindled as it ran along the edges of the tail. Additionally, most keys required enough work with the rasp that their factory edges were obliterated. To restore the chamfer, I used files designed to be used on guitar frets. These files feature concave cutting surfaces that matched the radius of the key edges very well. Not designed to cut plastic, the files loaded up quickly and required patience to do their work but the result was a nice even edge that required little or no follow-up dressing.3

The black keys don’t seem to commonly suffer from the same crazing that plagues white keys. The sharps for this piano were no more damaged than those of any previous unit I’d worked on although they did have one or two visible chips to be repaired. As I’d done with reasonable success in the past, the damaged areas were filled with black super glue. After sanding and polishing, the fill was indistinguishable from its surroundings unless it caught the light in just a certain way.

1I now use a much larger tool that appears to have been a bread knife in a former life. Holding the key upright on its face, I tap the knife down between the top and the wood.Return

2For filling gaps in keys, I’ve begun using Durham’s Rock Hard Water Putty. It’s easier to prepare, provides more working time, doesn’t emit any vapors and blends better visually with the existing wood.Return

3Those fret files took forever to turn a hard corner into a smooth round-over. Now I do most of the work with a modified scraper blade. I still finish with the fret file because its length leaves a very even edge.Return

Key Bushings

The plastic keys on my last piano required nothing more than to be cleaned before being reinstalled. When I began working on this, my first piano with wooden keys, I was eager to explore the workings of its more standard action assembly. I may have been too eager as I probably ended up investing more time in the keys than in all other components combined.

The keys employ felt at several contact points to make their interaction with other parts smoother and quieter. Each key mounts in the piano by two narrow metal guide pins which are pressed into what appears to be oak or ash rails on the key frame. The openings in the keys through which the pins pass is padded with felt bushings. These bushings will eventually wear out allowing the key to move too much from side to side and giving the piano a very sloppy feel. Since the front bushings bear the brunt of abuse from zealous players, their guide pins are specially shaped – more oval than round. When the pins are rotated, their thickness changes relative to the keys’ bushings. In this way, a bushing replacement job can be forestalled until the material’s condition is critical and can no longer be compensated for by turning pins.

The balance guide pins at the keys’ fulcrum are round and offer no mechanism for adjustment. The keys’ balance bushings can be adjusted slightly by manipulating the wood they’re glued to but once the felt has worn down very far, it must be replaced to restore the piano’s original feel. In retrospect, and particularly after having since seen key bushings that were truly worn beyond their usefulness, the bushings on this piano did not need to be replaced. I was so interested in digging into some “real” piano repair work that I convinced myself that the job was necessary. I could have just turned the front pins a little and been done with it but it was a learning experience nonetheless.

Before new bushings could be installed, the old ones had to come out. Steam is typically used to soften the glue under piano bushing felt. I had also read naphtha would work on the Rhodes felts. For me it seemed no amount of solvent or time was enough to convince the glue to let go so I resorted to acetone. A big problem with acetone is that it quickly reacts with the plastic of the key caps. An errant drop will instantly damage the surface of the caps… but boy did it make short work of the glue.

Although it worked easily on the balance bushings, the acetone seemed to have no effect on the front ones. Coincidentally, another member of The Electric Piano Forum happened to have just posted the same experience during his first key bushing job. He reported that steam was an effective means of removal. I don’t have any equipment for working with steam but my friend Matt showed me a simple solution often used to steam out small dents on solid-body guitars. With a soldering iron and a wet rag, I was able to press steam directly into the felt. After about thirty seconds of this treatment, the felt fell off the wood taking all of its glue with it. Since the steam was so much safer, did not give off volatile fumes and clearly outperformed the acetone, I used it for all of the remaining bushings.

Installing new bushings is very reminiscent of the game Operation. Inserting the proper amount of felt and securing it in place for the glue to dry requires special tools and a degree of finesse. The felt is supplied in a continuous roll. The common approach is to apply glue to the ends of two separate lengths of felt, insert and secure them at the proper depth, then trim off the excess either immediately or after the glue dries. The felt can be held in place by a variety of blocks, cauls or clips such as the set I purchased from Vintage Vibe. Before I learned this method, I had already become comfortable with my own technique and since it seemed to yield satisfactory results, I saw no reason to change.

Rather than trim the pieces after they were set, I precut the felt. After covering one side of the pieces with glue, I maneuvered them into position perched at the edge of the hole in the key. When the metal clip was inserted in between them, they rode down into the hole and positioned themselves perfectly. Although at first I cut my felt a little large and had to trim them down, I soon began cutting them short enough that they required no further work after their glue dried.

When the keys were finally reinstalled, most of them gripped their guide pins far too tightly. I think that between the steam causing the wood to swell and having used a one-size-fits-all gluing clip, I was left with more easing to be done than would otherwise have been necessary. To open the gap between the bushings I used a small pair of pliers to slightly compress the wood under the felt. A putty knife worked well as an outside clamping caul for this operation.